|
|
Post by woody66 on Sept 29, 2017 12:04:35 GMT 1
I was originally just going to post pictures of the finished model but after some input from Viscount on the subject of modelling, I have decide to post the construction pictures of where I am up to. I will also give my comments where needed. My first comment on this model is that it also includes the parts to construct Airfix's other two Dakota models the C-47 Skytrain and the MK II. [a href=" 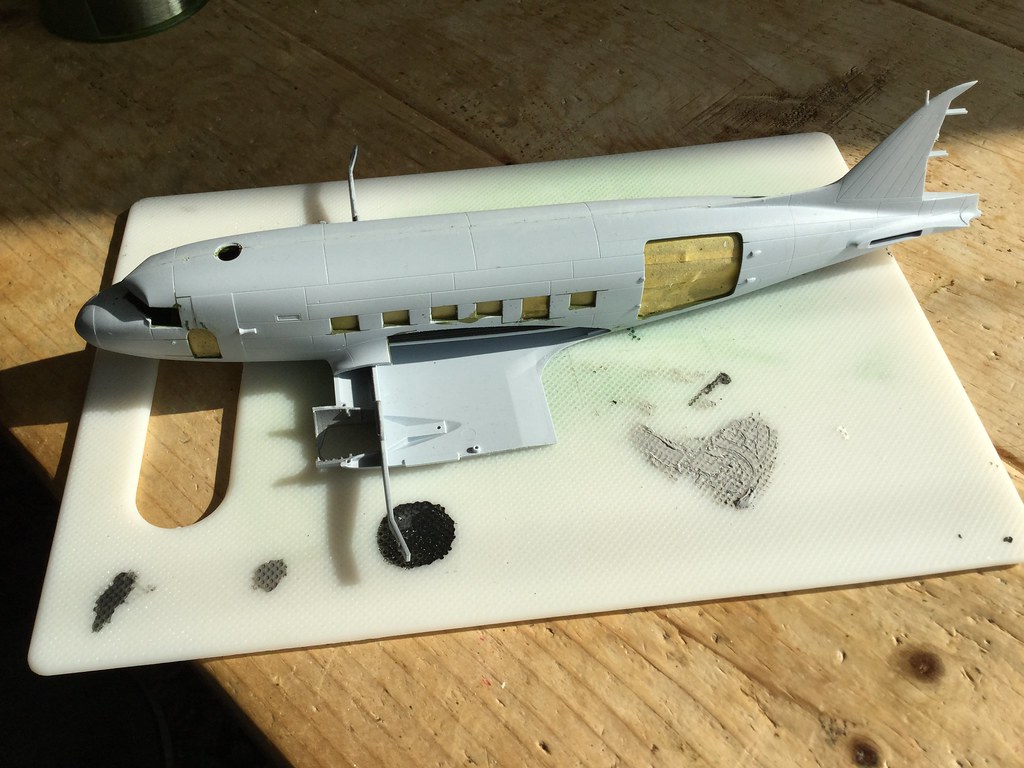 Picture one shows my internal masking as I am undecided as to whether or not leave the doors open. [a href="  Picture two shows you how, even with new tooling the parts are slightly out of alignment. [a href="  Picture three is the tail wheel housing. [a href=" 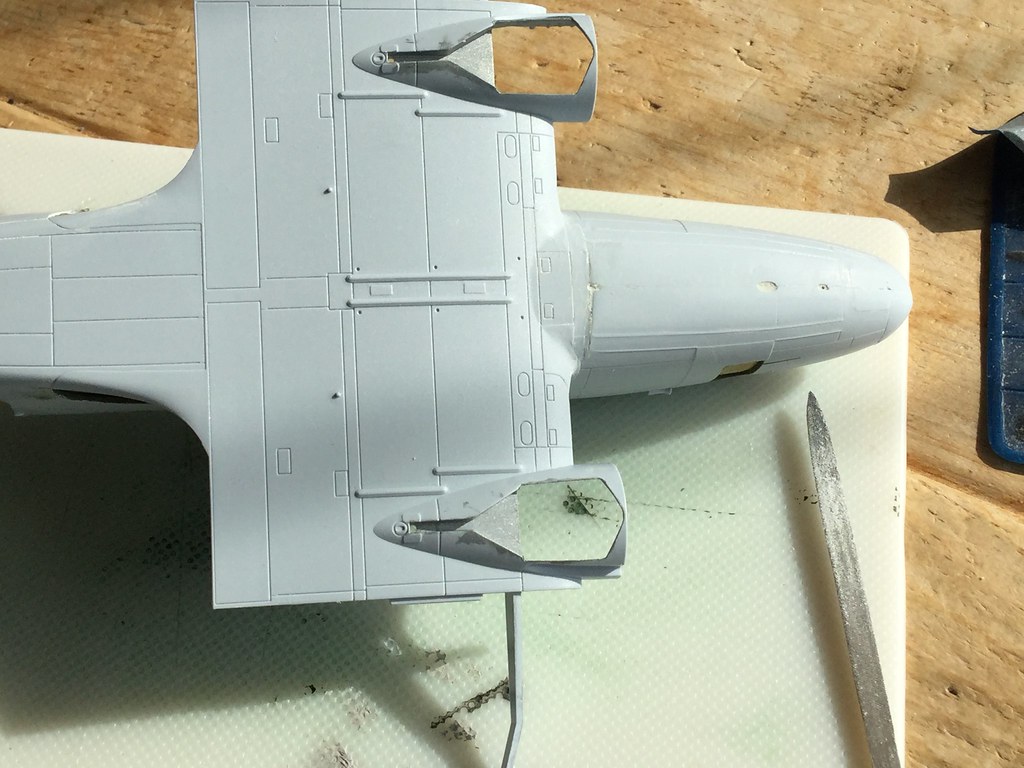 Picture four is of the lower wing and fuselage joins that require filling after gluing. [a href=" 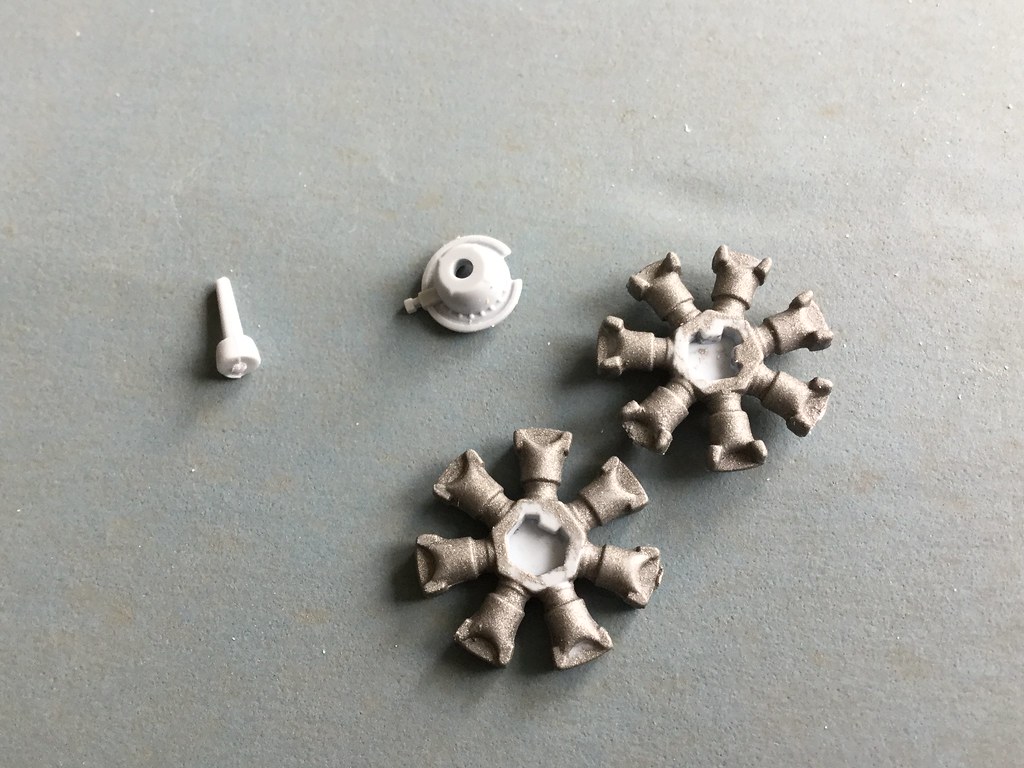 Picture five shows the cylinders and prop attachment pre assembly. [a href=" 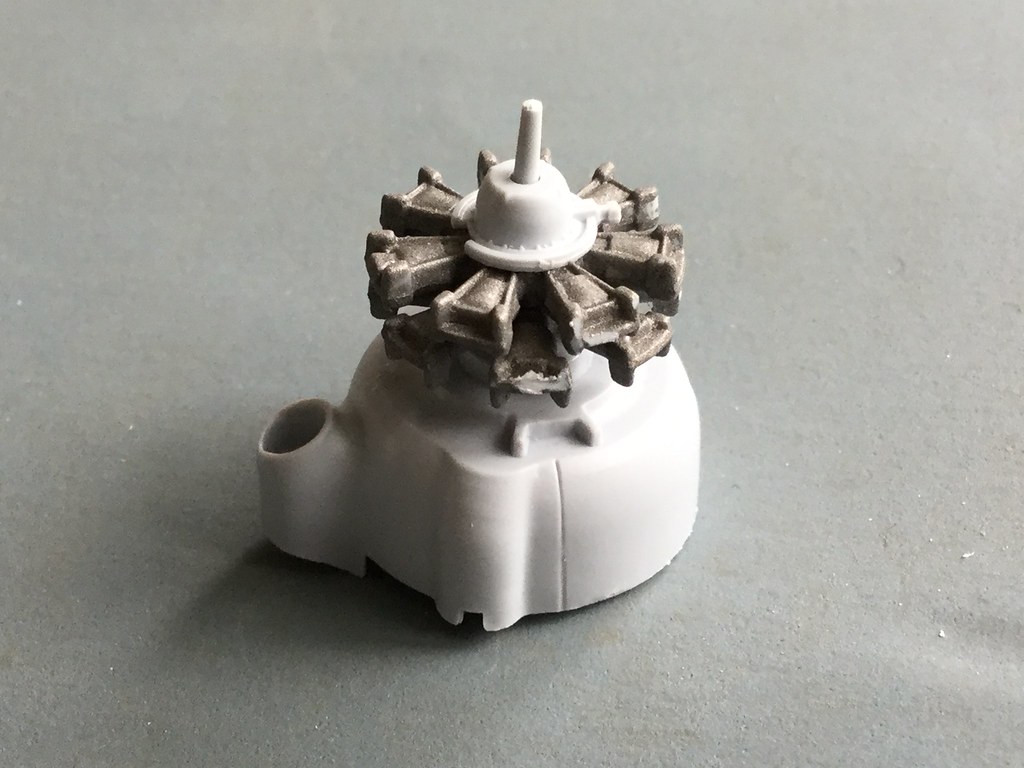 Picture six shows the cylinders joined to the rest of the engine mount. [a href=" 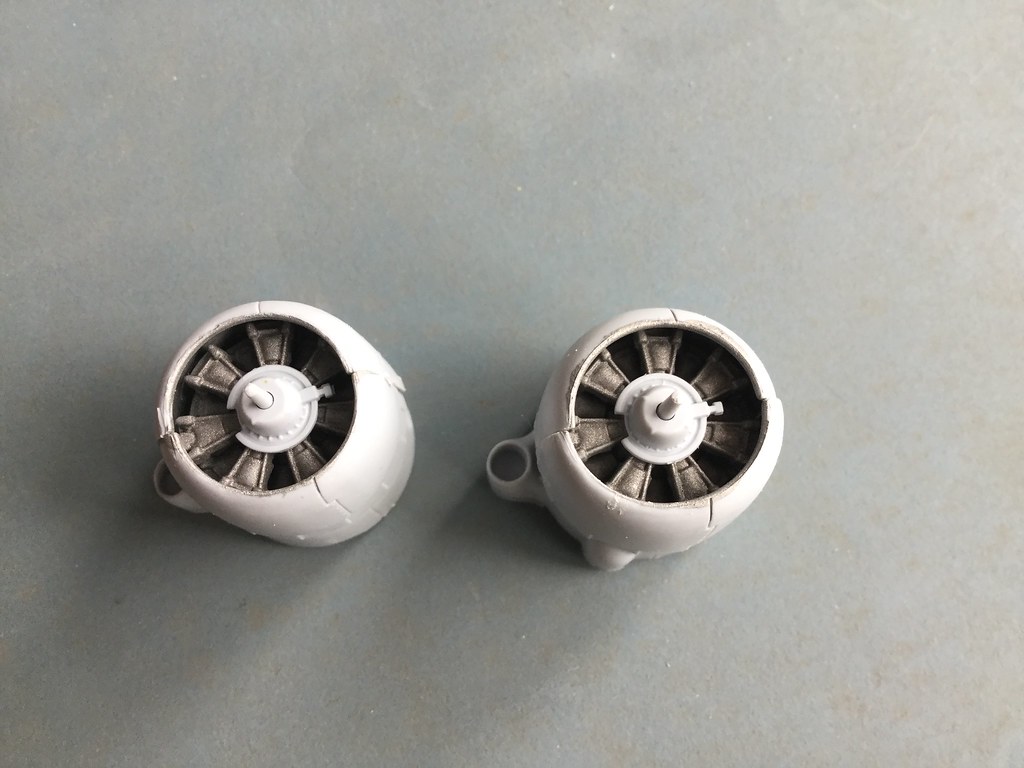 Picture seven shows both engines complete with cowlings. You can also see how badly the cowlings fit together. [a href="  Picture eight. The wings are on but you can see the gaps between them and the fuselage, so more filling to be done. [a href=" 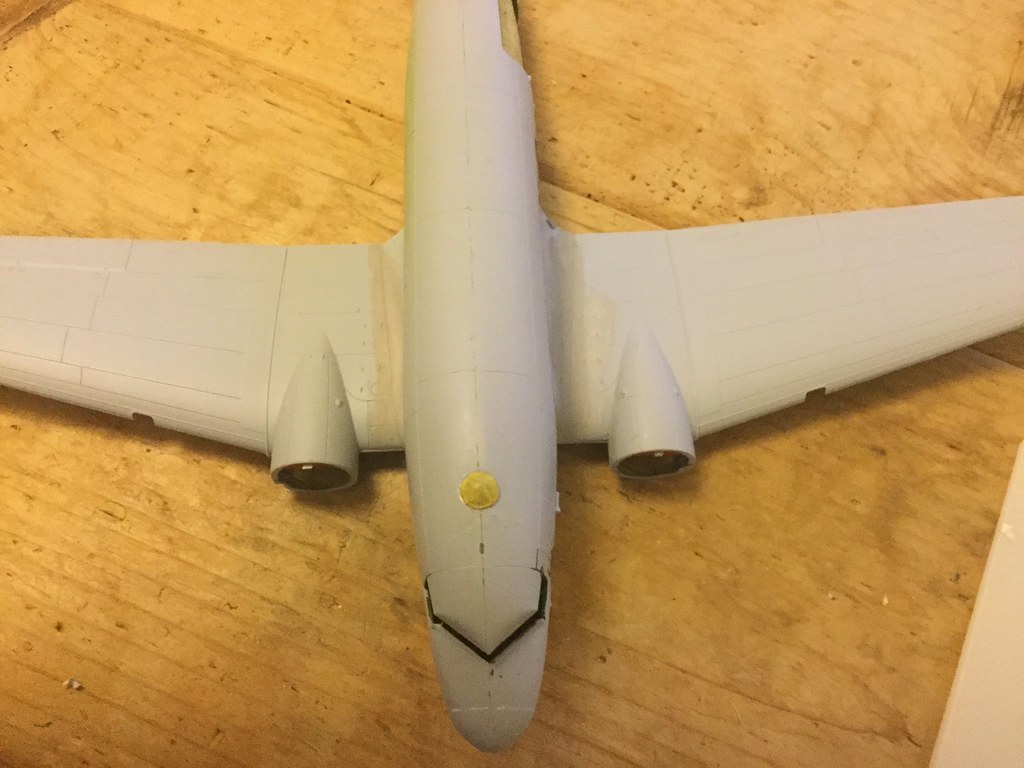 Picture nine The gaps have now been filled as sanded. That is all for now. I apologise for the amount of picture but I think it may help others who are thinking about doing this model with what to expect. Colin |
|
|
|
Post by csnewton2701 on Sept 29, 2017 12:26:24 GMT 1
Looks good so far.
It's amazing how badly some kits fit together. I remember building the Skytrain and that was bad.
Chris
|
|
|
|
Post by woody66 on Sept 29, 2017 12:36:03 GMT 1
I know. It is supposed to be new tooled and also a skill level 3 but with all the extra work it is needing it should be a 4. Still it should be worth it once its finished Chris.
Colin
|
|
|
|
Post by viscount on Sept 29, 2017 15:41:49 GMT 1
I like the idea of what is essentially a spar, presumably to help line up the dihedral angle on wings. Can recall that my 1960s 'Silver City' schemed Airfix 1:72 Dakota 'flew' rather lopsidedly due to one wing being 'flatter' than the other.
|
|
|
|
Post by csnewton2701 on Sept 29, 2017 15:44:18 GMT 1
Some of the 'new tooling' is worse than the older tooling. The amount of wings I've had to bodge together.
Chris
|
|
|
|
Post by woody66 on Sept 29, 2017 20:20:34 GMT 1
The spar also has the landing lights moulded into it Viscount. One of the pluses with this model I have found.
|
|
|
|
Post by woody66 on Oct 9, 2017 10:35:35 GMT 1
A few updates on my Dakota. [a href=" 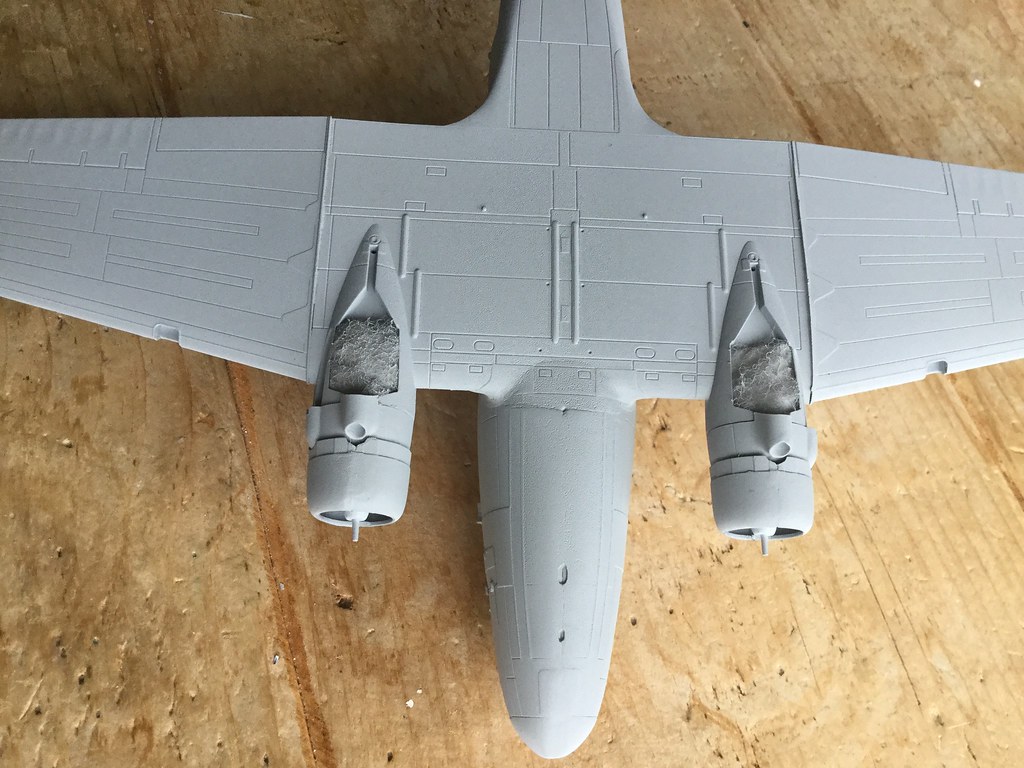 Picture 10 Shows the wheel wells packed out with cotton wool, this is my own preference for pre-painted wheel wells instead of trying too mask them off for fuselage painting. [a href="  Picture 11 Shows the windscreens in and masked up as well as the various antenna's [a href=" 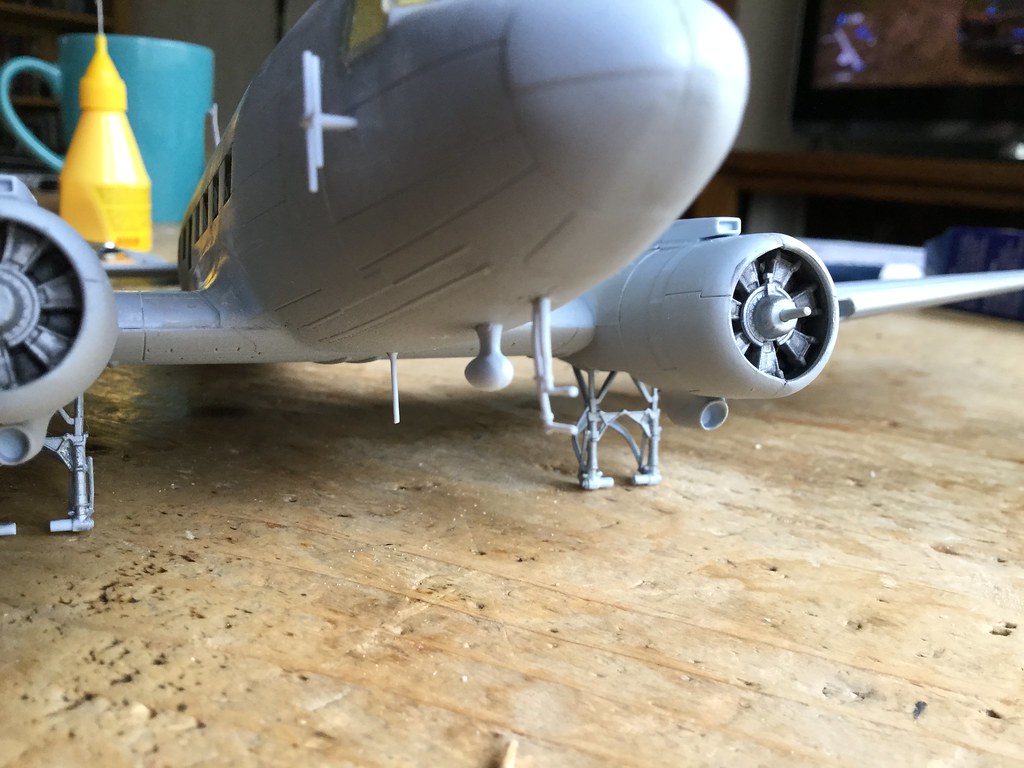 Picture 12 Shows the under carriage in place minus the wheels. Each under carriage comprises 7 parts and needs some bracing to hold it in the correct position. I found the cotton wool worked reasonably well for this. The next series of pictures should be mainly of the painted final model fingers crossed. |
|
|
|
Post by csnewton2701 on Oct 10, 2017 9:33:27 GMT 1
Looking good. Can't wait to see it finished.
Chris
|
|
|
|
Post by woody66 on Oct 13, 2017 9:52:40 GMT 1
Thanks Chris. This weekend should see all the painting finished.
|
|
|
|
Post by woody66 on Oct 16, 2017 9:50:14 GMT 1
[a href=" 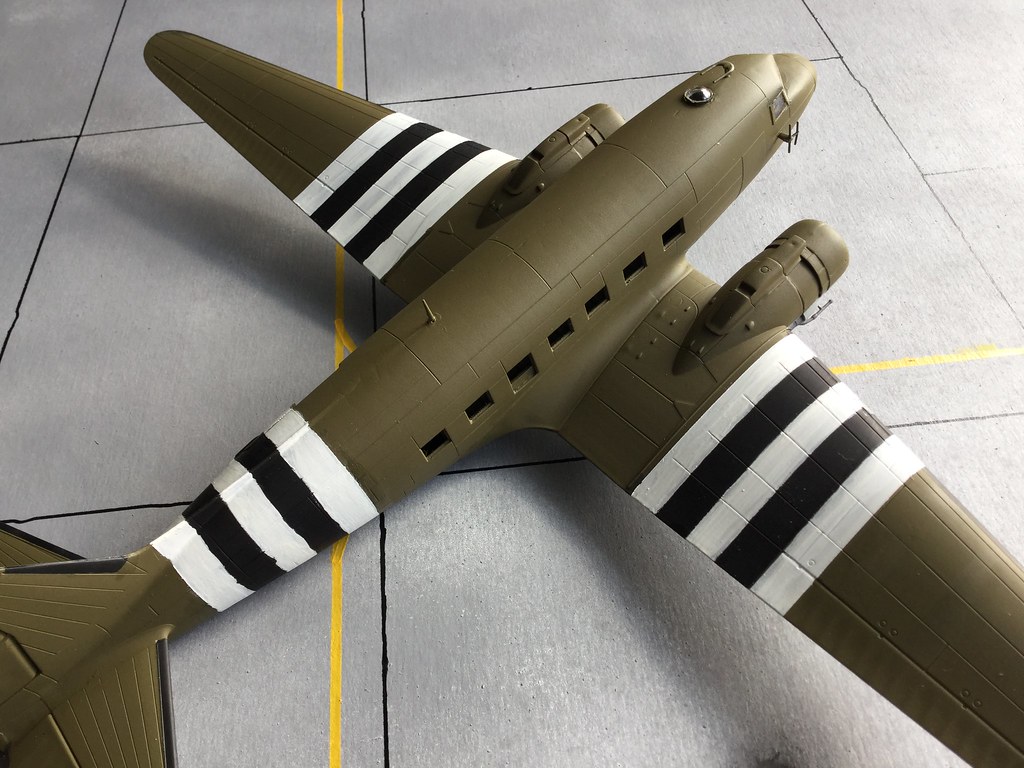 Picture 13 The overall drab olive paint and stripes have now been applied. [a href=" 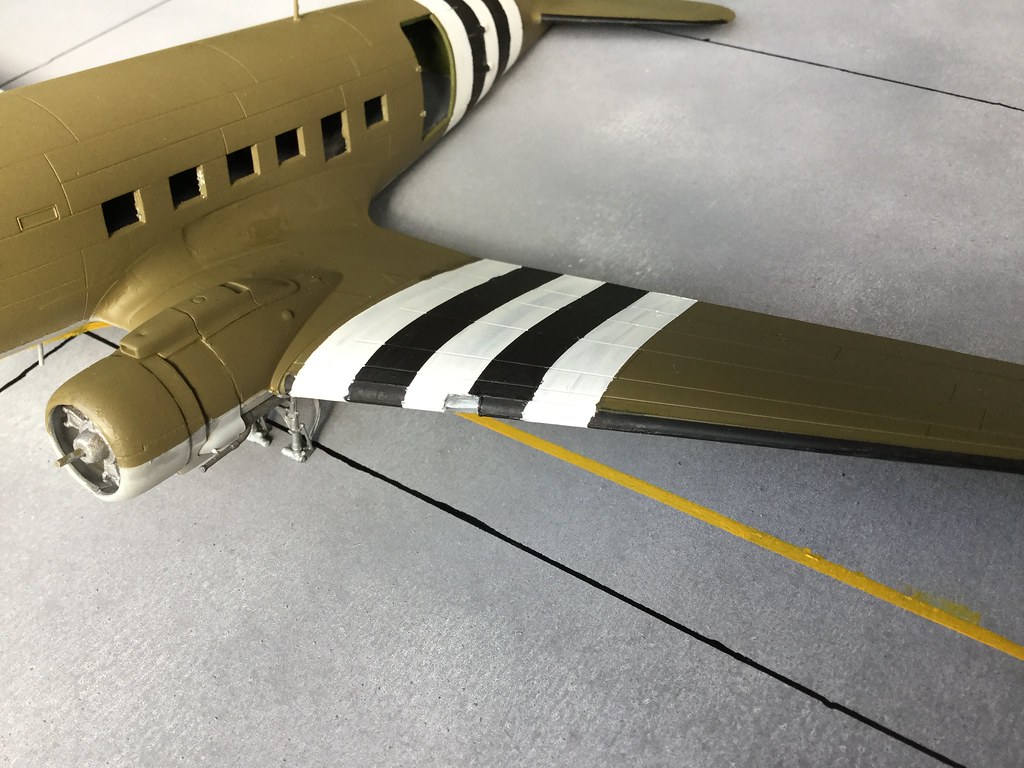 Picture 14 a close up of the wing stripes and the lens cover. [a href=" 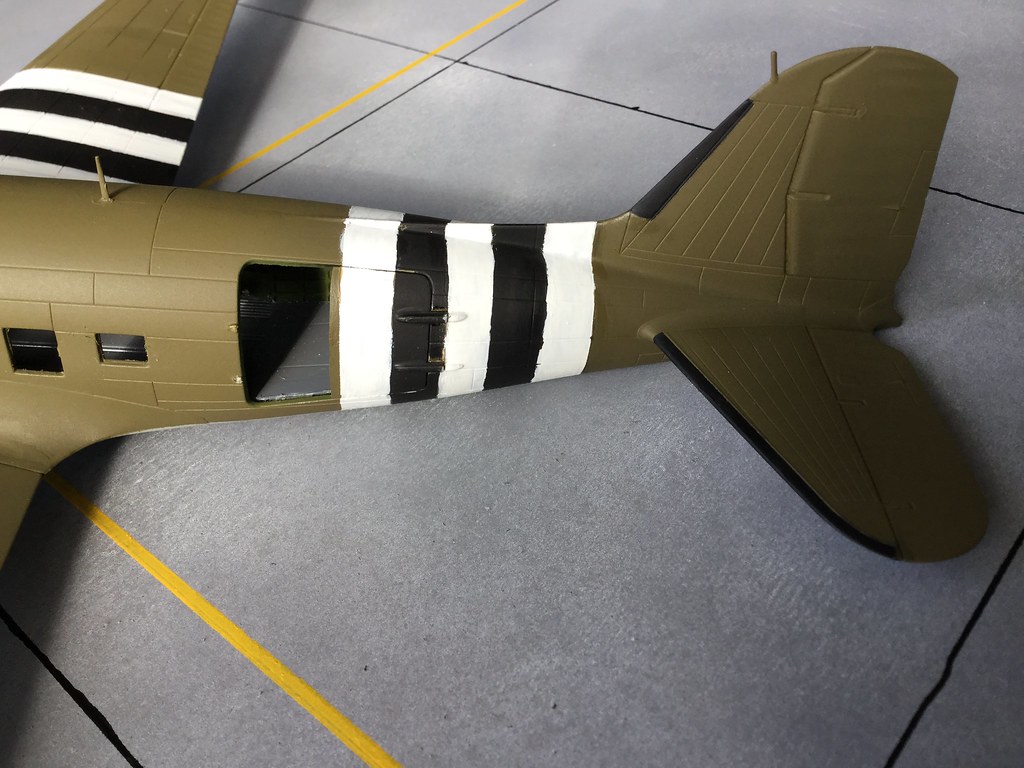 Picture 15 One cargo door in place and the unmasked out fuselage stripes. [a href=" 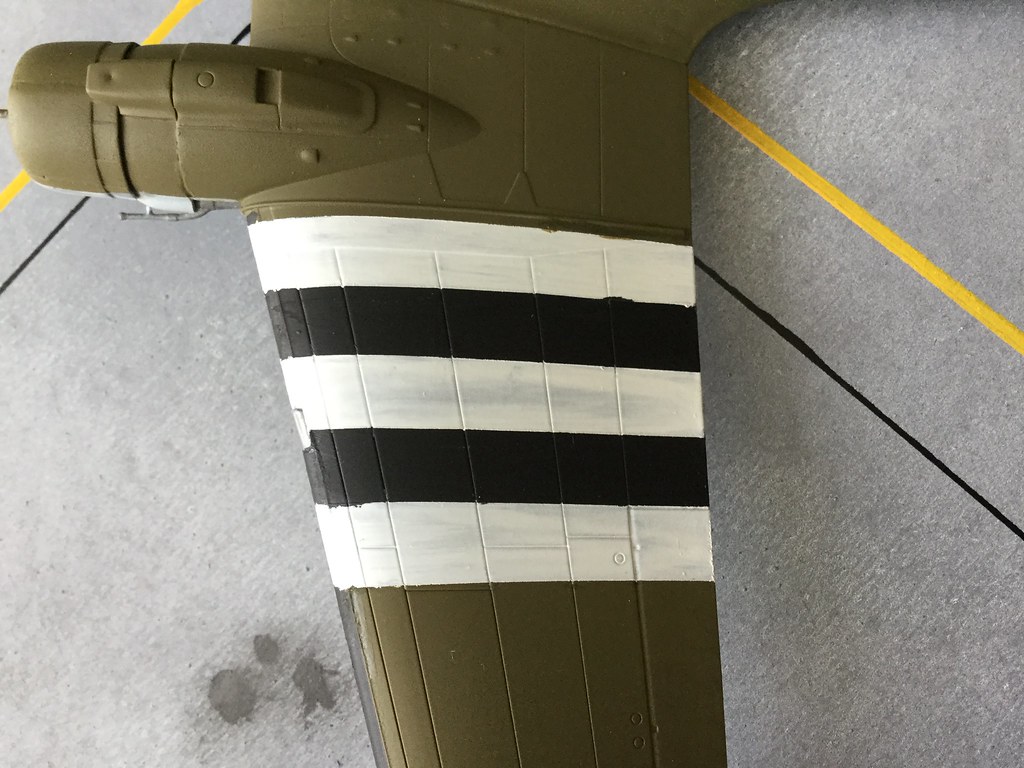 Picture 16 upper wing stripes. [a href=" 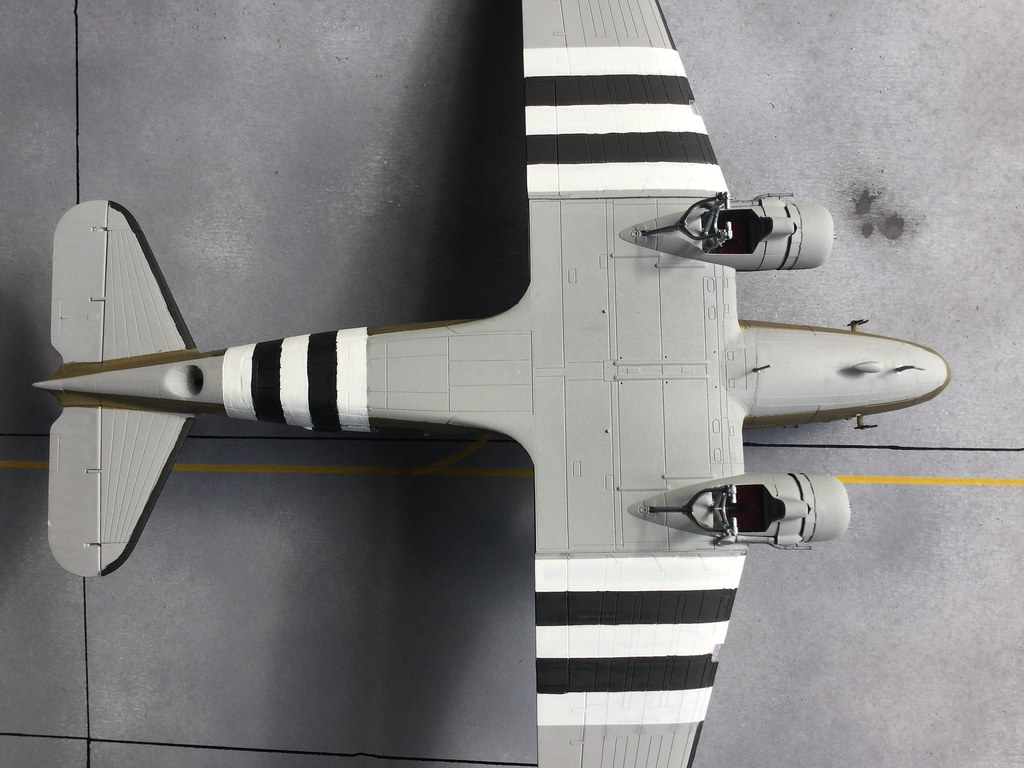 Picture 17 Underside showing the stripes. The final set of pictures will be of the finished model. I will also add my thoughts on this kit then. Colin |
|
|
|
Post by csnewton2701 on Oct 16, 2017 11:30:27 GMT 1
Looking good, will you be putting a para by the door ready to jump?
Chris
|
|
|
|
Post by woody66 on Oct 16, 2017 12:20:58 GMT 1
Hi Chris.
Thank you.
No the other half of the cargo door will be open with the hook on step in place I'm afraid but I might just buy the Italeri version for comparison and do that configured for para drops.
Colin
|
|
|
|
Post by csnewton2701 on Oct 16, 2017 12:52:58 GMT 1
|
|
|
|
Post by woody66 on Oct 16, 2017 13:18:32 GMT 1
Hi Chris.
Very interesting link, you have me thinking now.
Colin
|
|
|
|
Post by woody66 on Oct 25, 2017 11:12:00 GMT 1
[a href=" 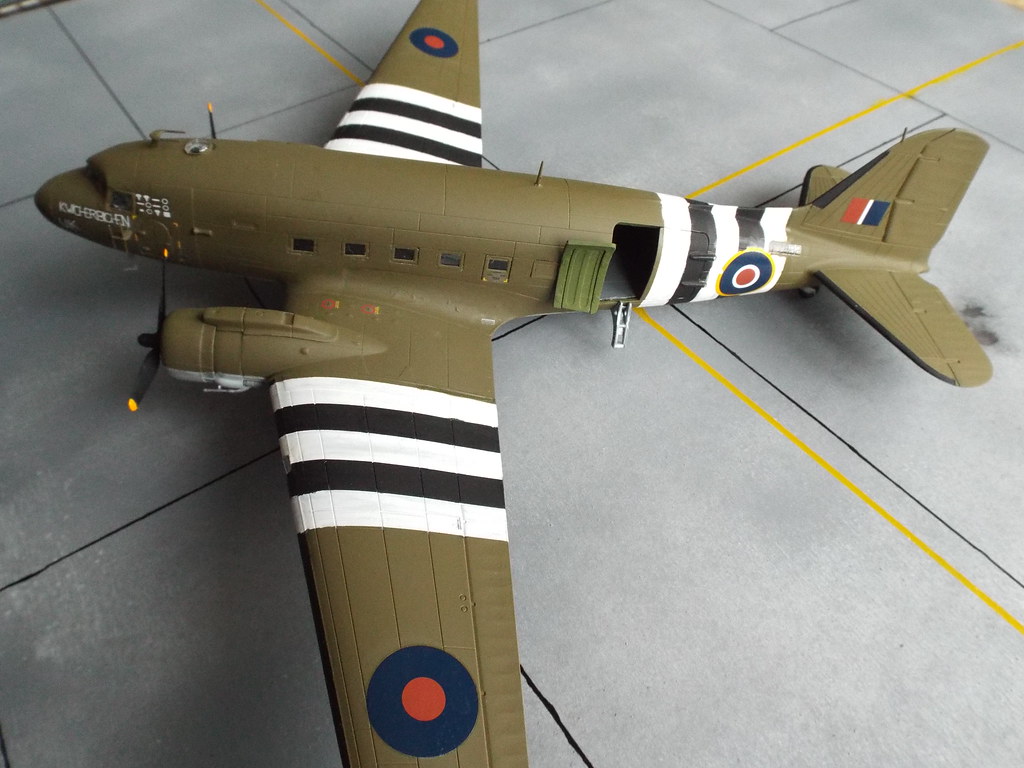
[a href=" 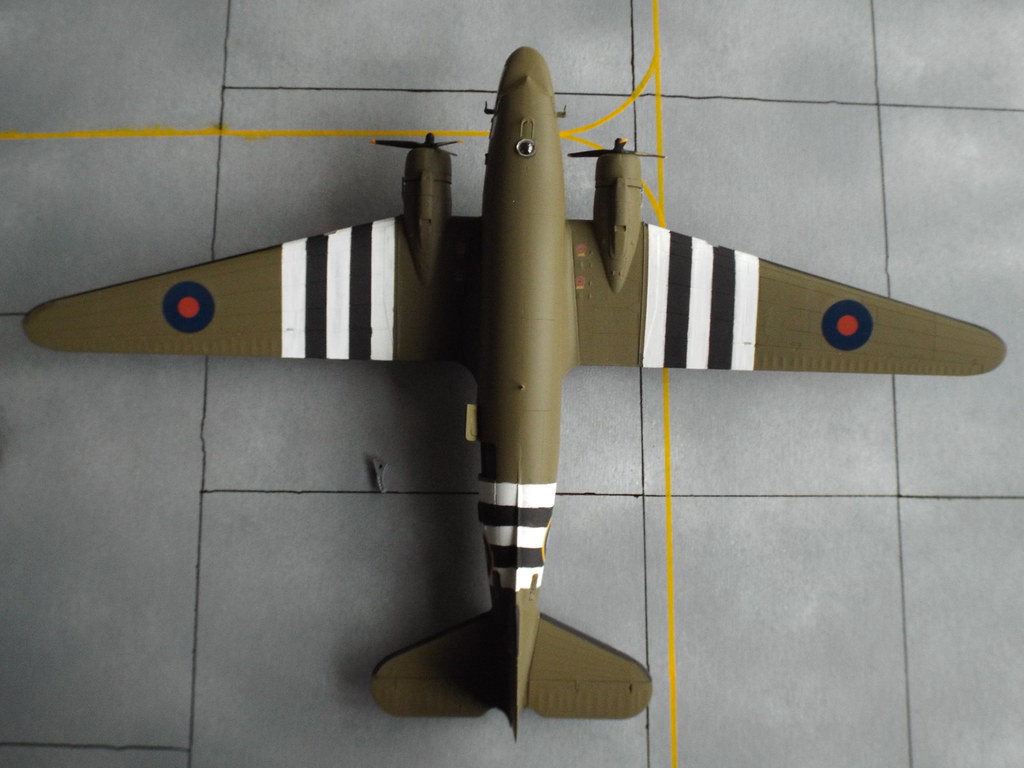 [a href=" 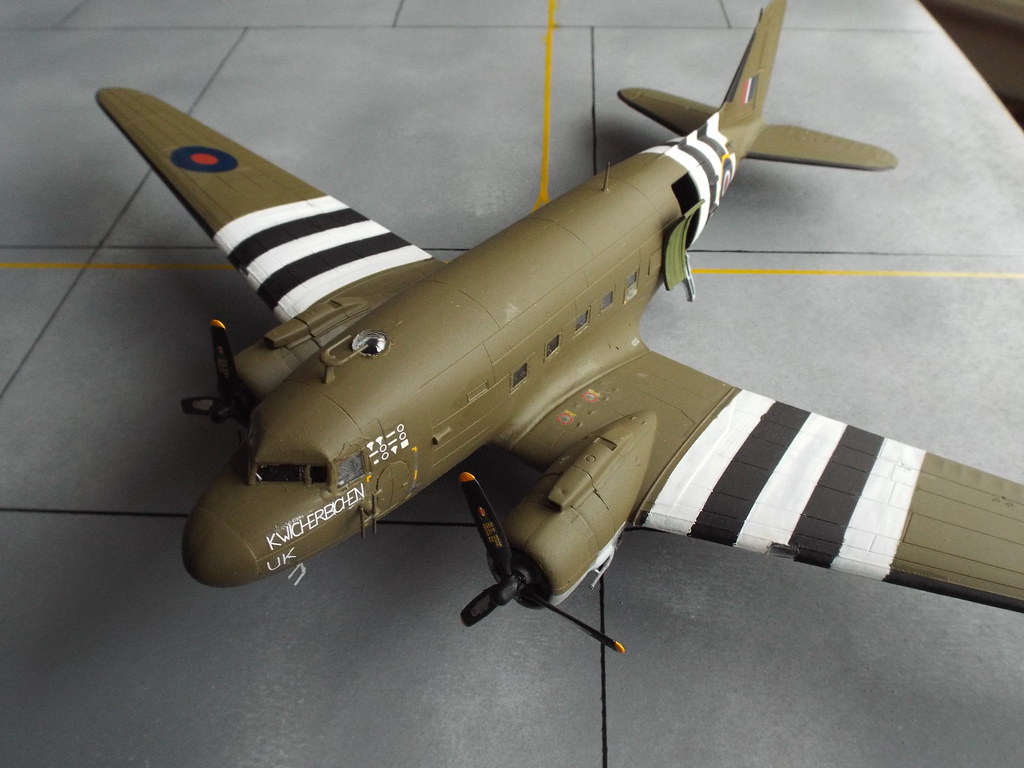
[a href="
[a href="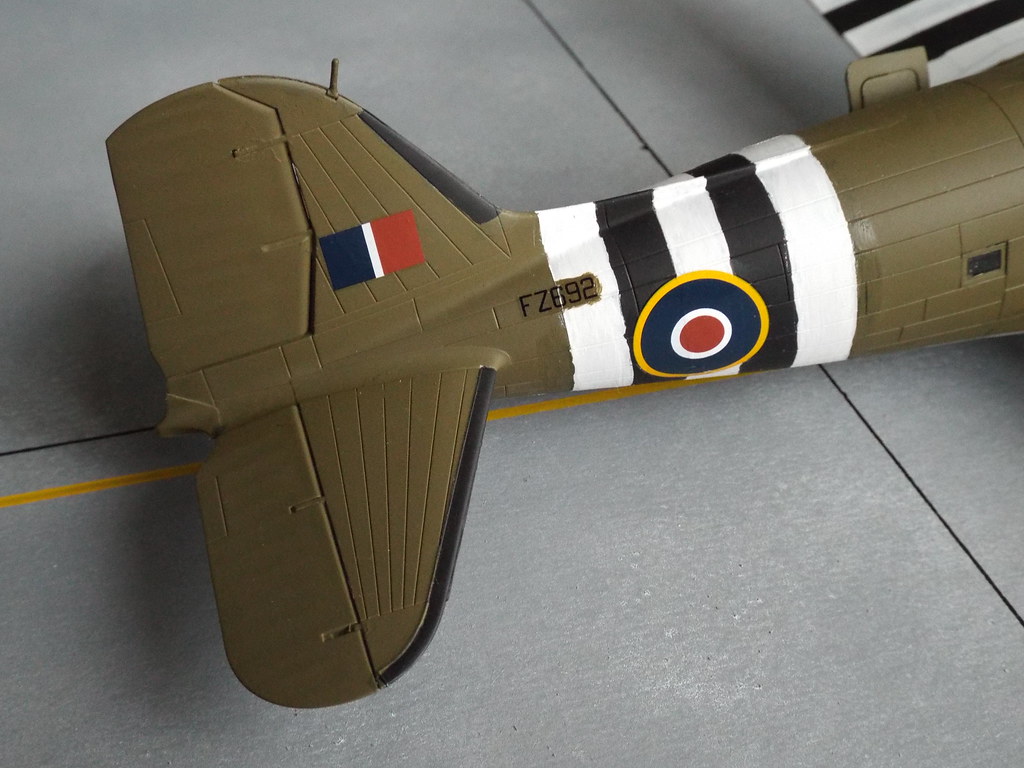
Finally finished and marked up as FZ692 5T-UK of 233 Squadron RAF Blakehill Farm. I have painted it with masked stripes on the wings and un-masked stripes on the fuselage. This was because of a tale I was told by an old school friends uncle who actually had the task of painting the stripes on a few Dakota's just a few days before 6th of June. He told me that he and two other members of the ground crew where given buckets of paint and large whitewash brushes and told to go and paint some stripes on the Dakota's. They managed to mask and paint the wings on the first day but rain intervened on the next day and the masking wouldn't stick so they drew chalk lines on the fuselage and went for it. I believe very few planes flew with stripes that had been masked out. My thoughts on this model are mixed. The new tooling does not seem to have been of and benefit other than to produce better detailing but this seems to have caused alignment issues for the fuselage. The wings and engines are very well finished but as I have previously mentioned there is quite a gap to be filled between the wing and fuselage. The only other problem area is the windscreen as it is in three pieces and required a bit of filling of one piece to get it to fit. Would I do this model again? Yes even with the problems the finished model looks good. Thank you for taking the time to look and I hope you found this thread useful. Colin |
|


