Post by acklington on Jun 25, 2018 12:56:37 GMT 1
Due to summer 'distractions' this is not going to be a quick thread, but I'll try to keep you amused with occasional updates.
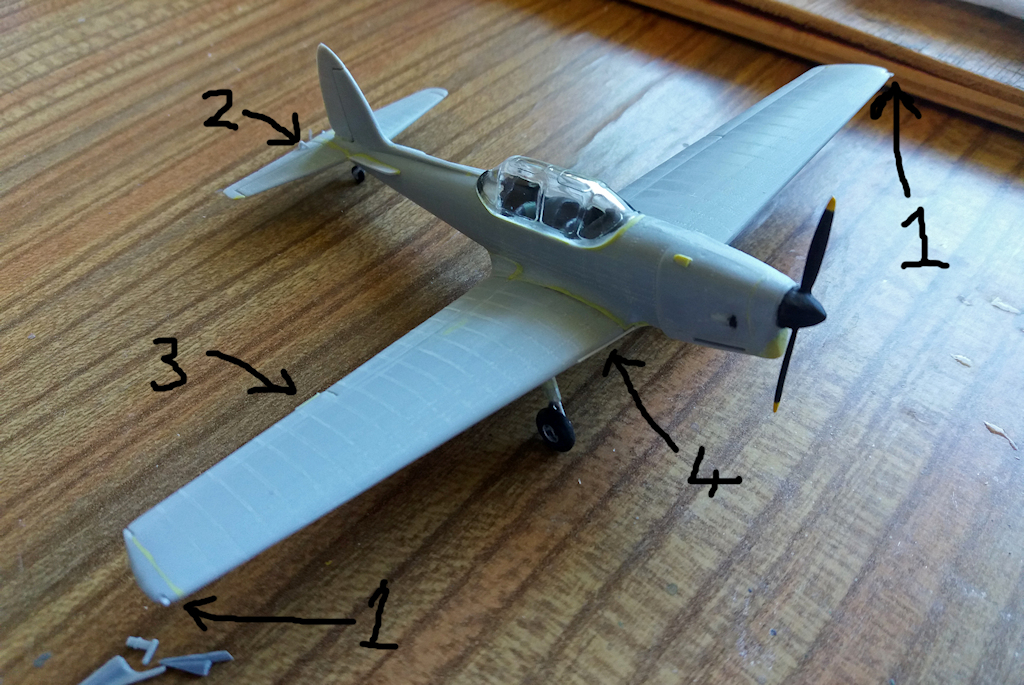
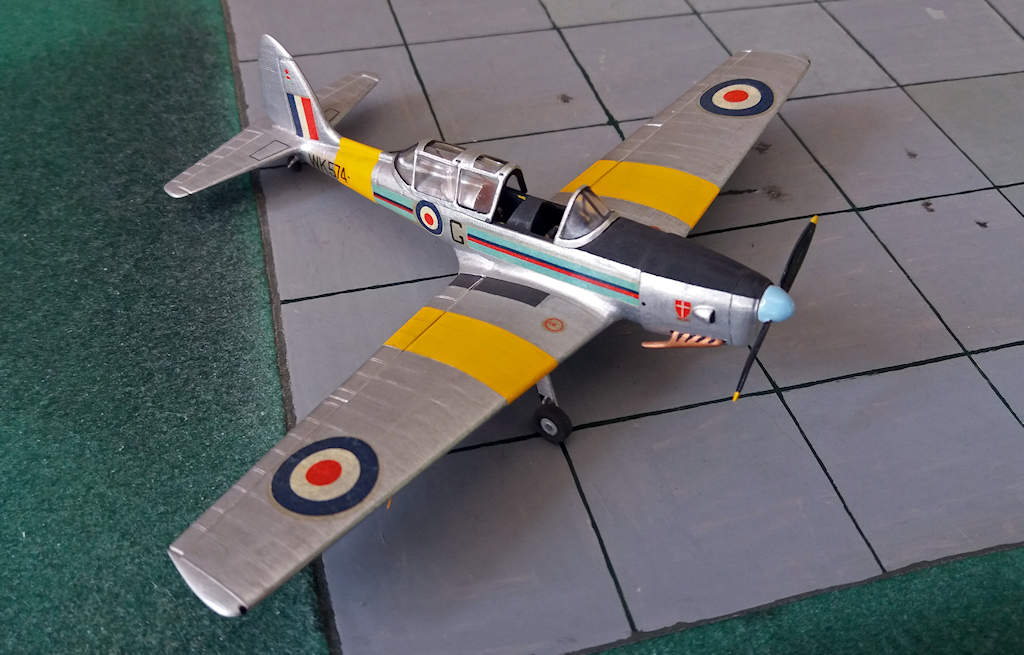
The starting point is an Airfix 1/72 Chipmunk T.10 that I built way back in 1969, shortly after the kit was released;
 WK574, Cambridge UAS, c 1952 by Philip Pain, on Flickr
I have never been happy with the look or accuracy of this kit, but at the time my skill only ran to doing something to correct the canopy, substituting the 'canadian option' windscreen which doesn't have an external frame at the front (it is internal on the real aircraft).
 WK574, Cambridge UAS, c 1952 by Philip Pain, on Flickr
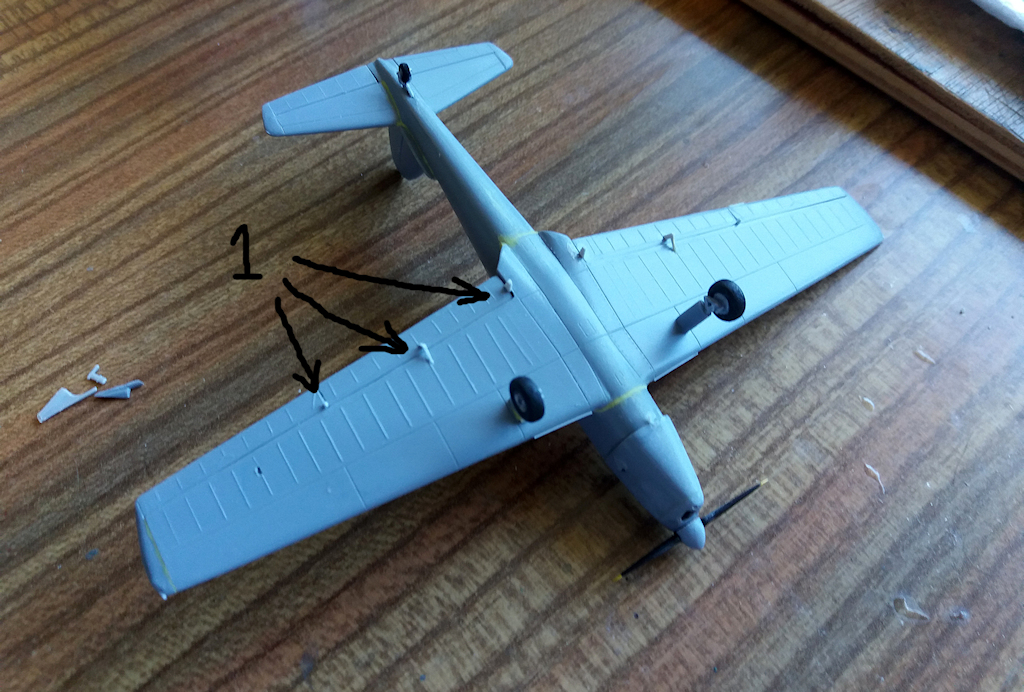
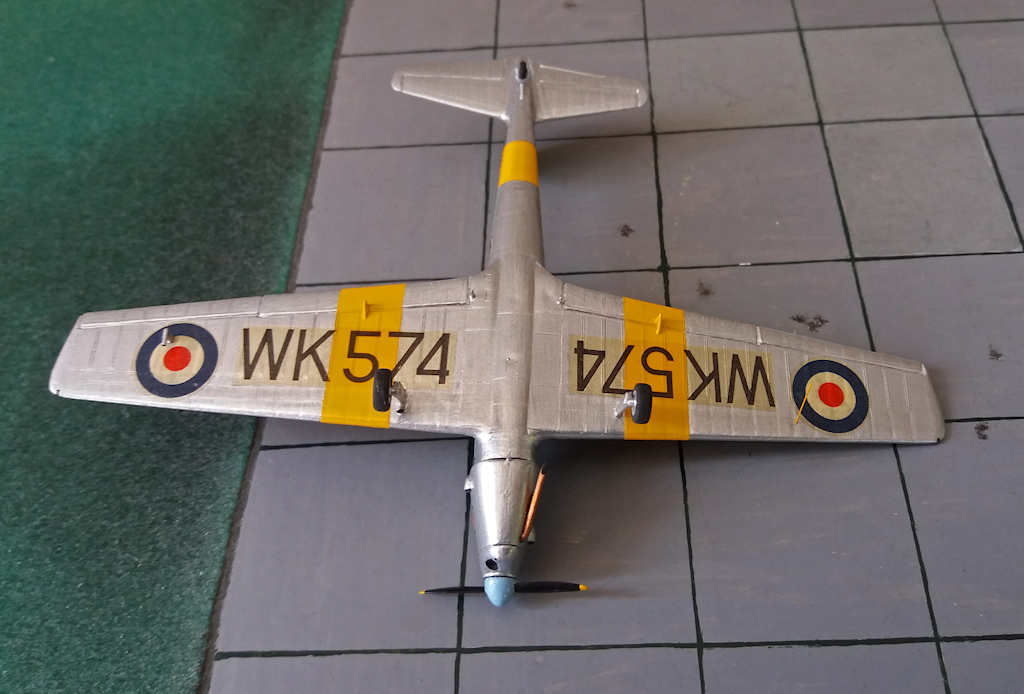
The model is showing its age and the transfers have yellowed. In this view it can be seen that I added the missing flap actuation hinges.
 WK574, Cambridge UAS, c 1952 by Philip Pain, on Flickr
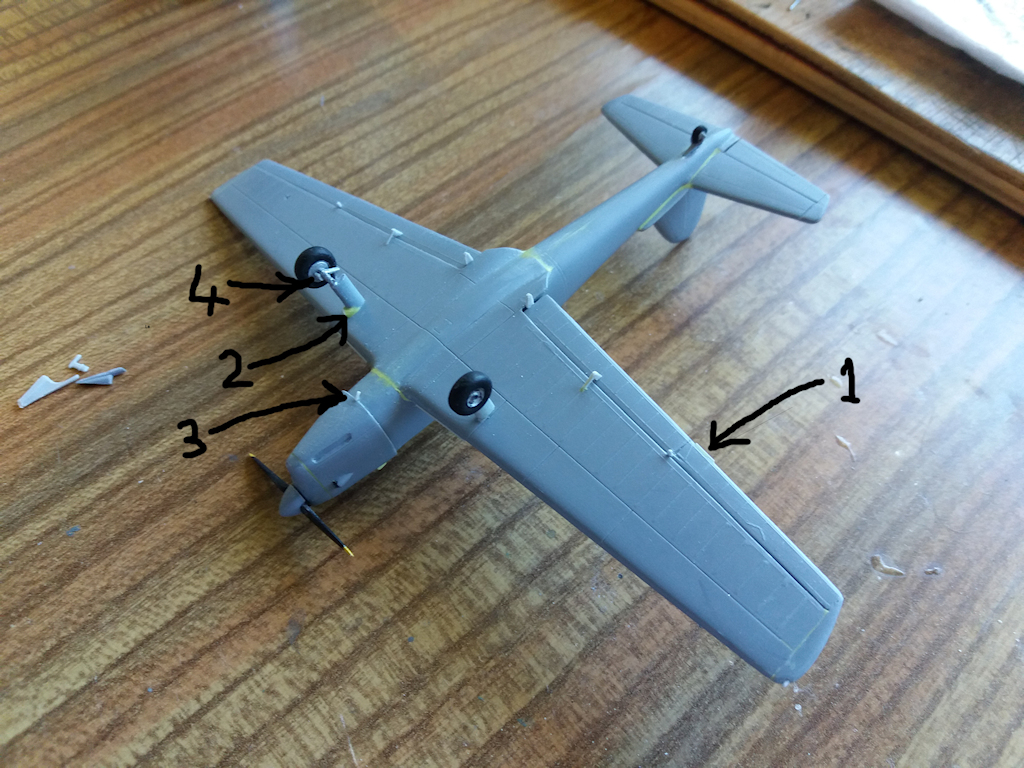
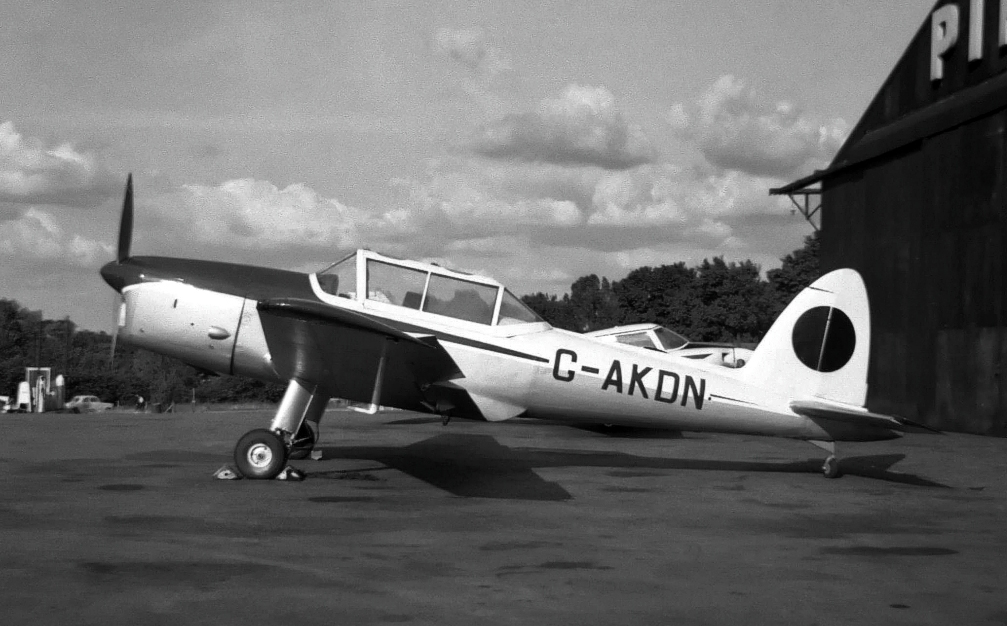
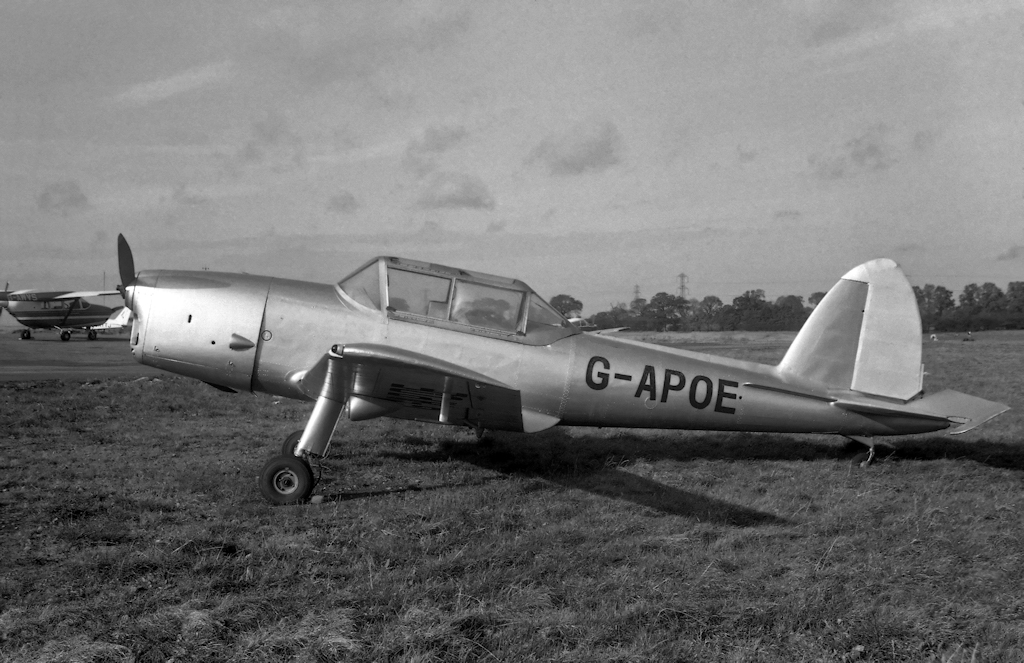
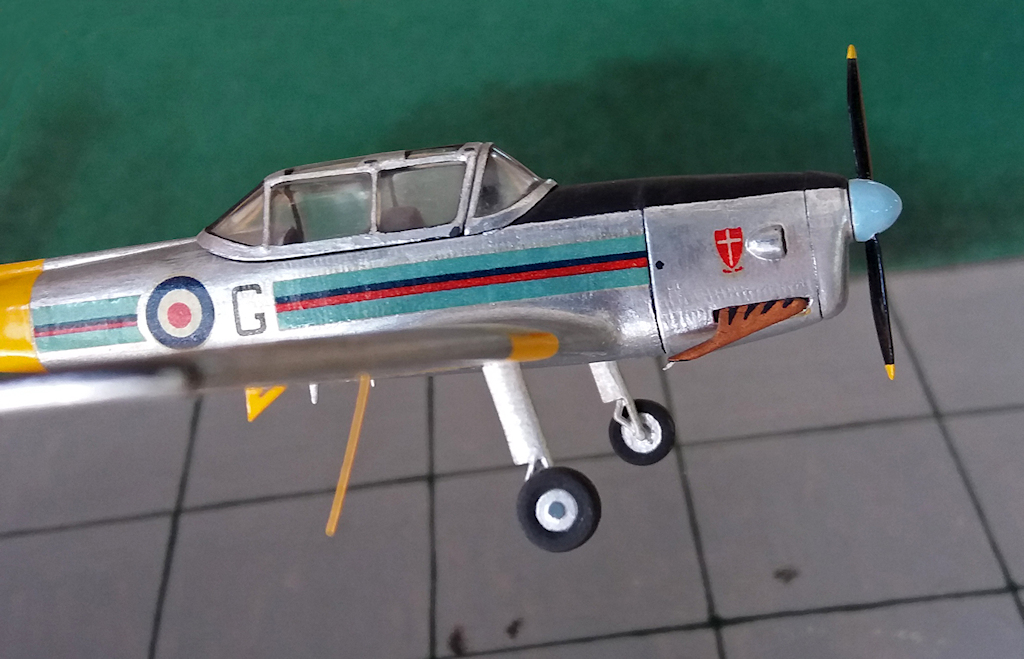
The main problem with the 'look' of the Airfix Chipmunk is that it doesn't have enough 'chin' at the front, also the propellor spinner is too short and bulbous. The intakes on the sides of the engine also too bulbous.
 WK574, Cambridge UAS, c 1952 by Philip Pain, on Flickr
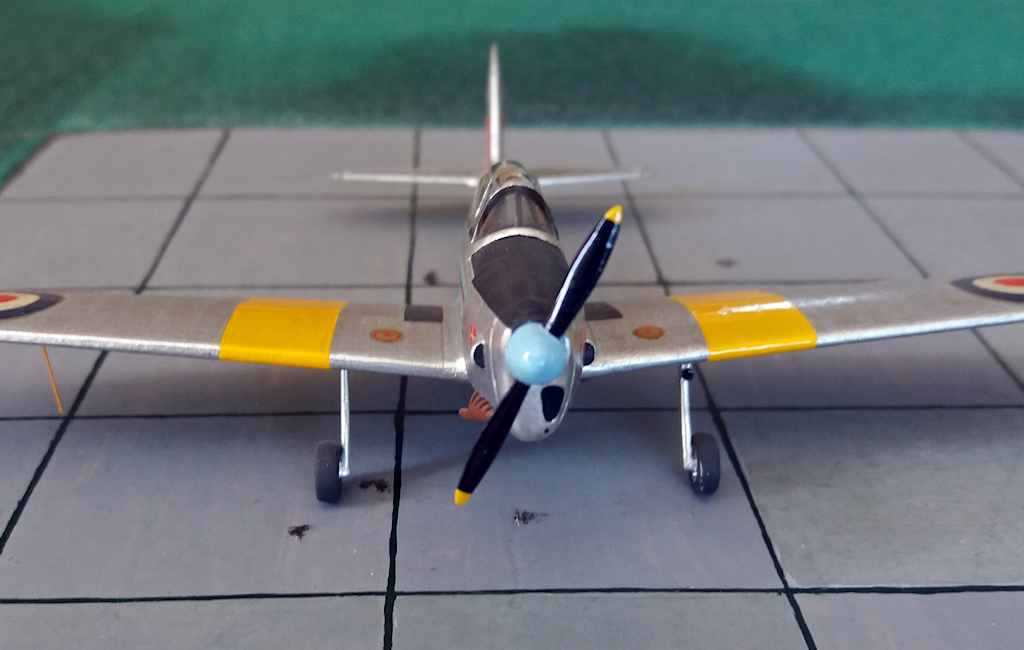
The other big problem is the undercarraige legs which are far too slim, and the wheels don't look right either, being too 'square'.
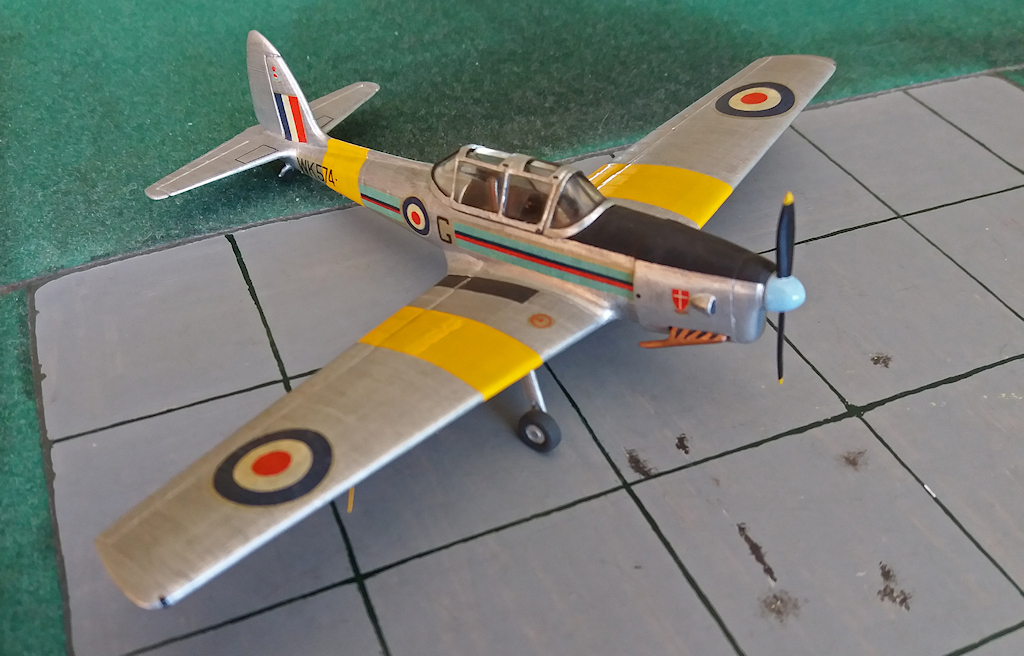 WK574, Cambridge UAS, c 1952 by Philip Pain, on Flickr
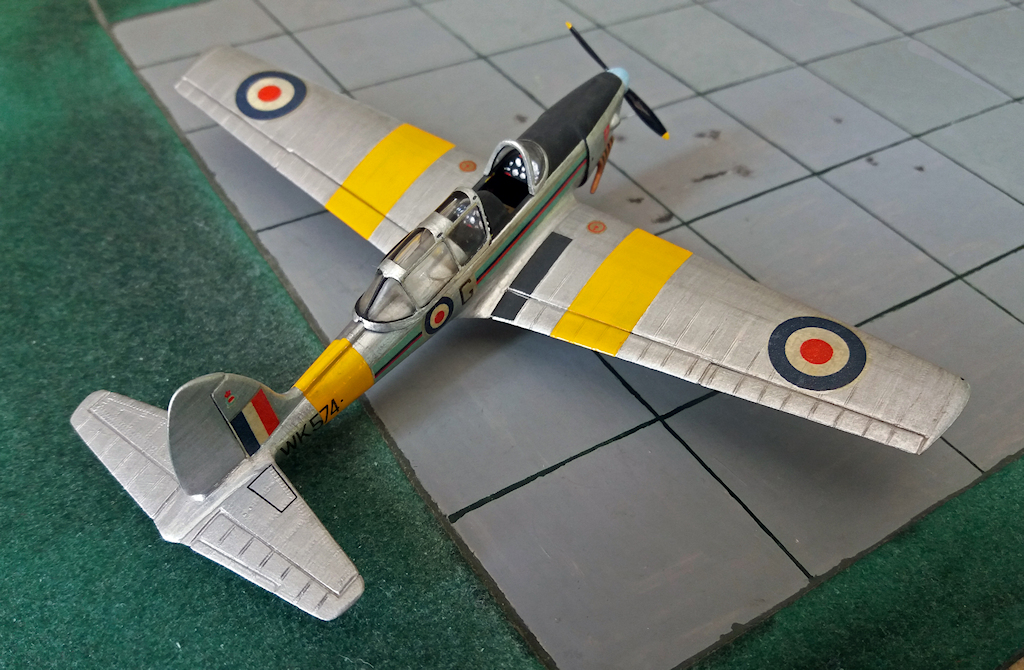 WK574, Cambridge UAS, c 1952 by Philip Pain, on Flickr
The cockpit has two seats and nothing else, so I added scratch-built instrument panels.
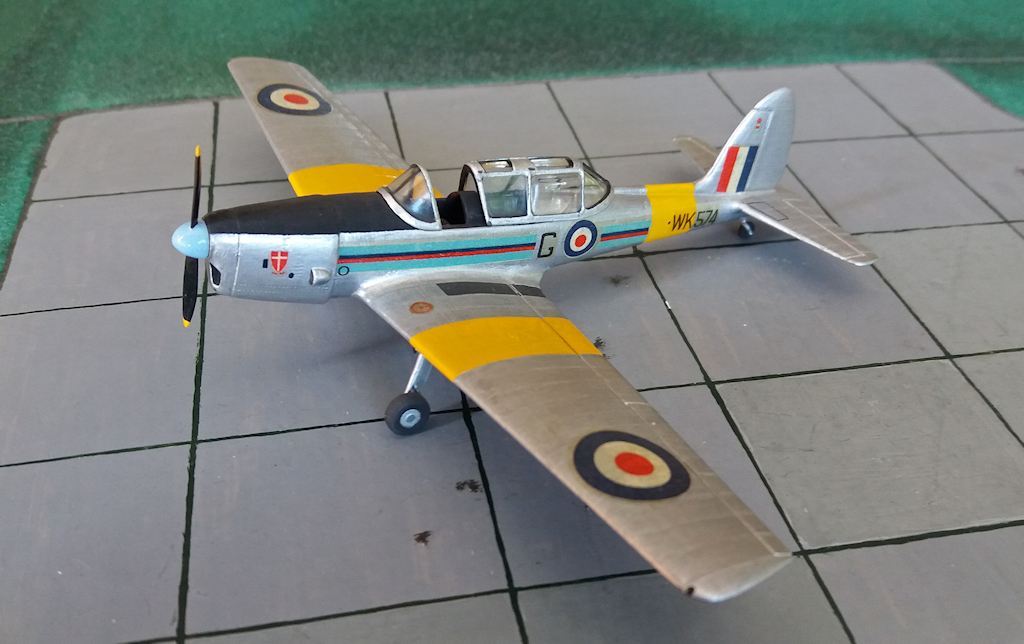 WK574, Cambridge UAS, c 1952 by Philip Pain, on Flickr
All of the raised rivets were rubbed down, not that they shouldn't be there, but they were far too prominent. I made a mistake with painting the yellow 'T-bands', they don't go on to the flaps.
So I was delighted when AZ Models recently released a new 1/72 Chipmunk kit, and the box promises much;
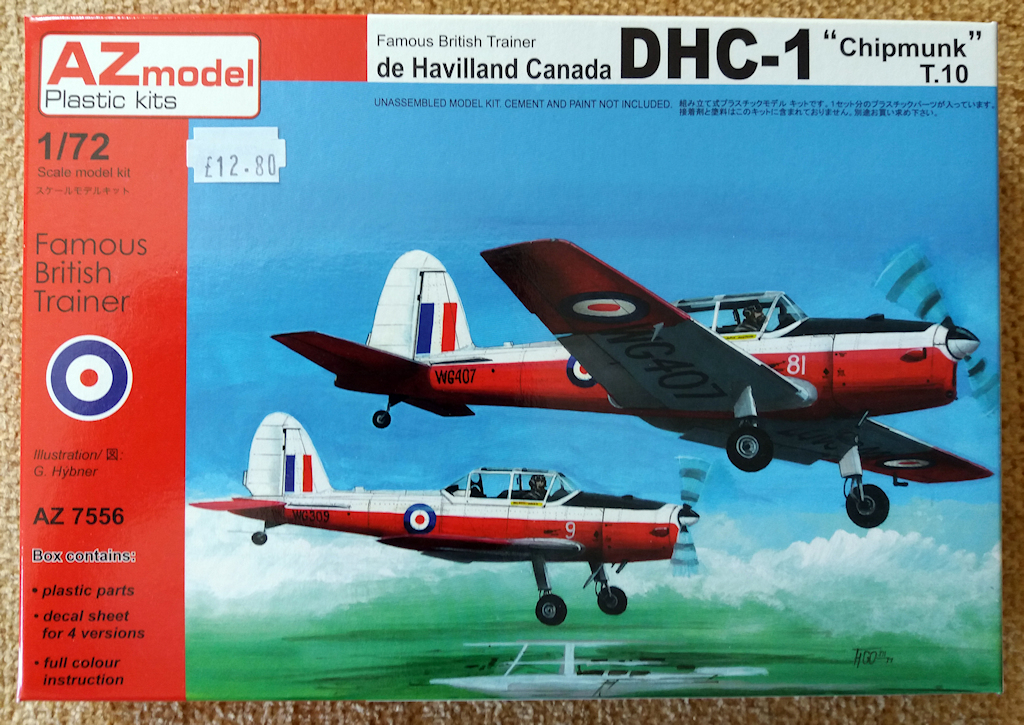 Chipmunk T.10 (1) w by Philip Pain, on Flickr
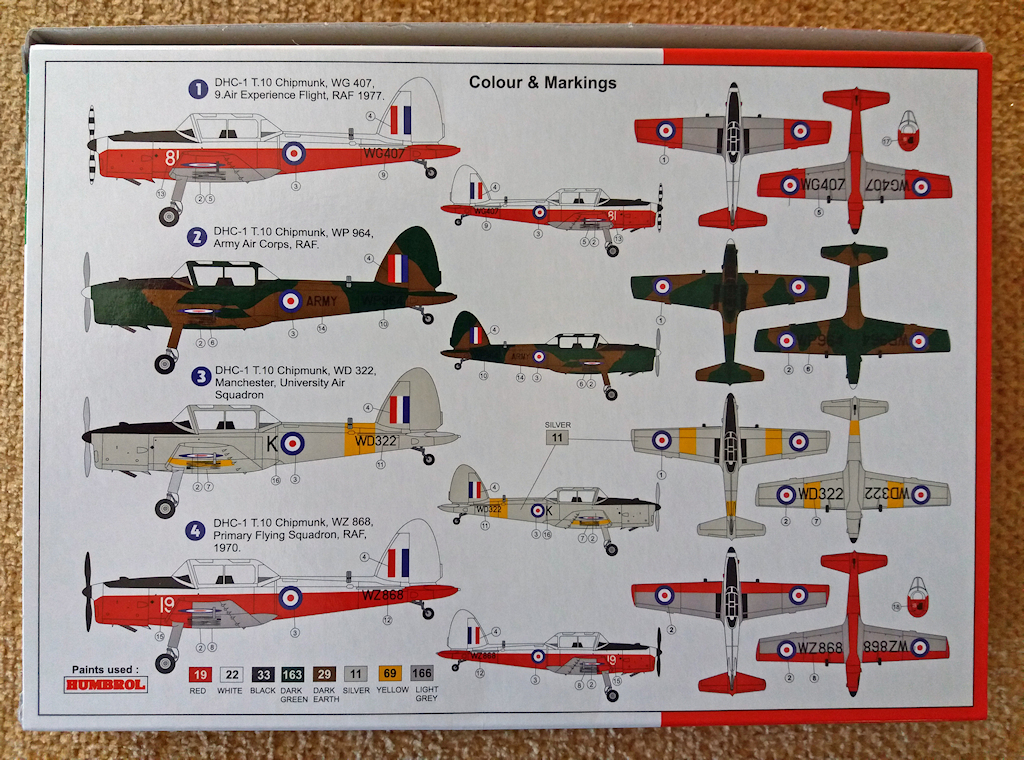 Chipmunk T.10 (2) w by Philip Pain, on Flickr
The contents were less inspiring, but seemed ok
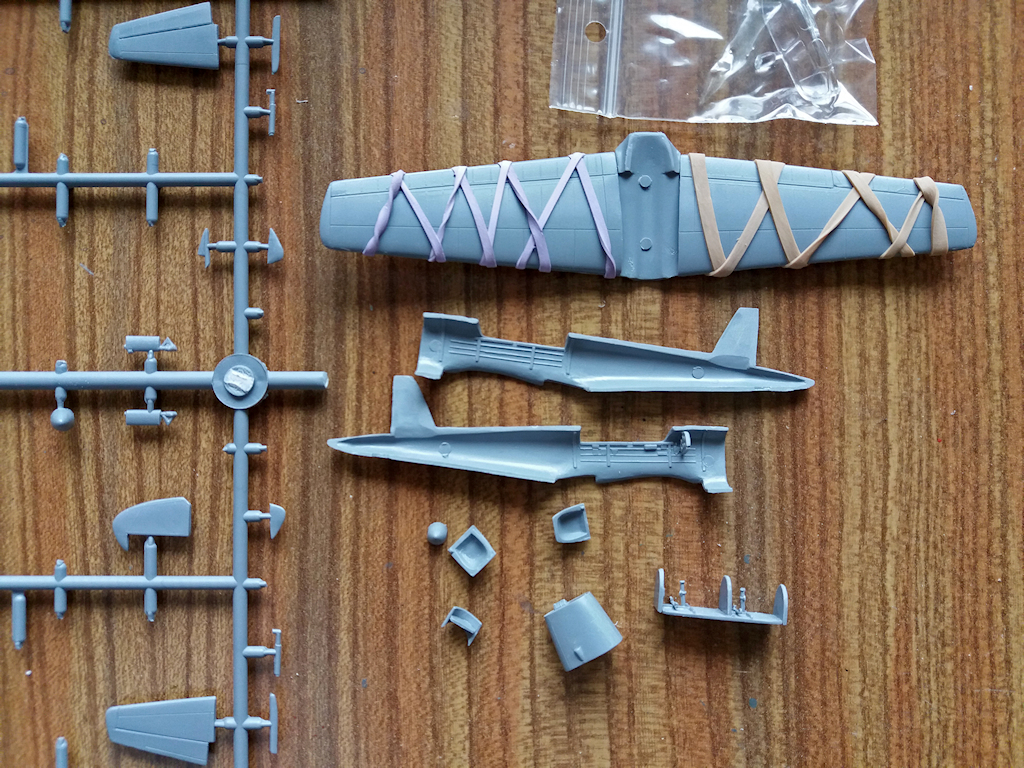 Chipmunk T.10 (4) w by Philip Pain, on Flickr
It is a typical 'short-run' kit, a bit rough around the edges, and generally lacking mounting pins and tabs, making it hard to glue together at times.
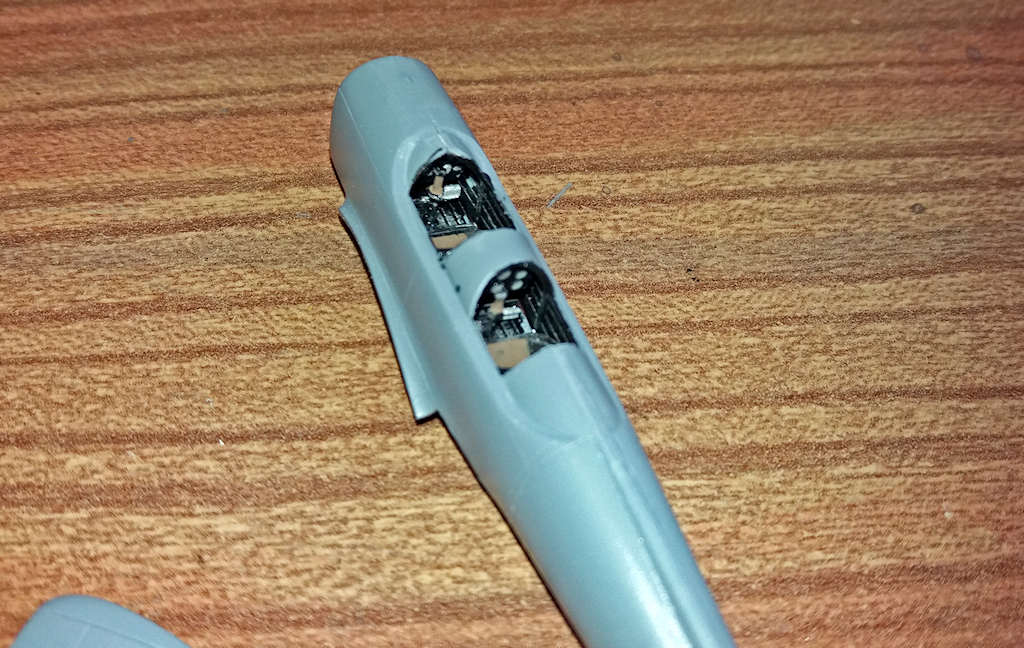 Chipmunk T.10 (7) w by Philip Pain, on Flickr
It has a full cockpit interior, but a familiar problem soon became apparent - once again the canopy is wrong! External frames front and rear, don't Chipmunk mould makers ever go and look at the real thing!? The AZ Models canopy is actually worse than the original Airfix one, because the windscreen is too long with the main frame set too far back. So I've tried to disguise this fault by extending the forward instrument coaming to fill the gap.
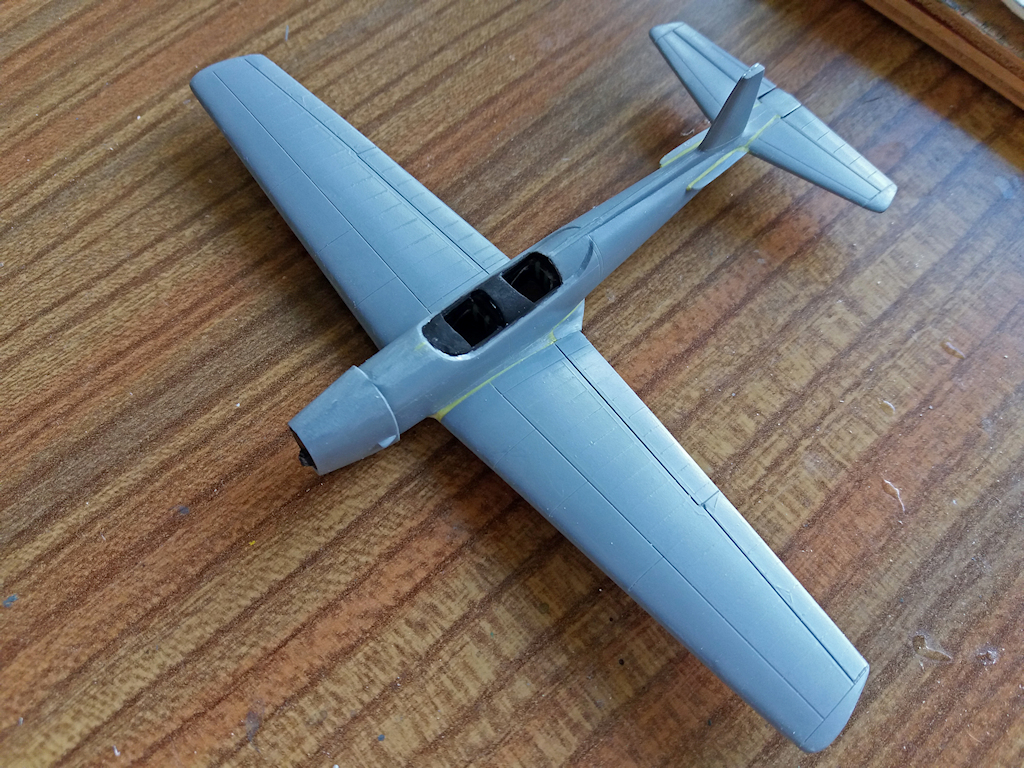 Chipmunk T.10 (8) w by Philip Pain, on Flickr
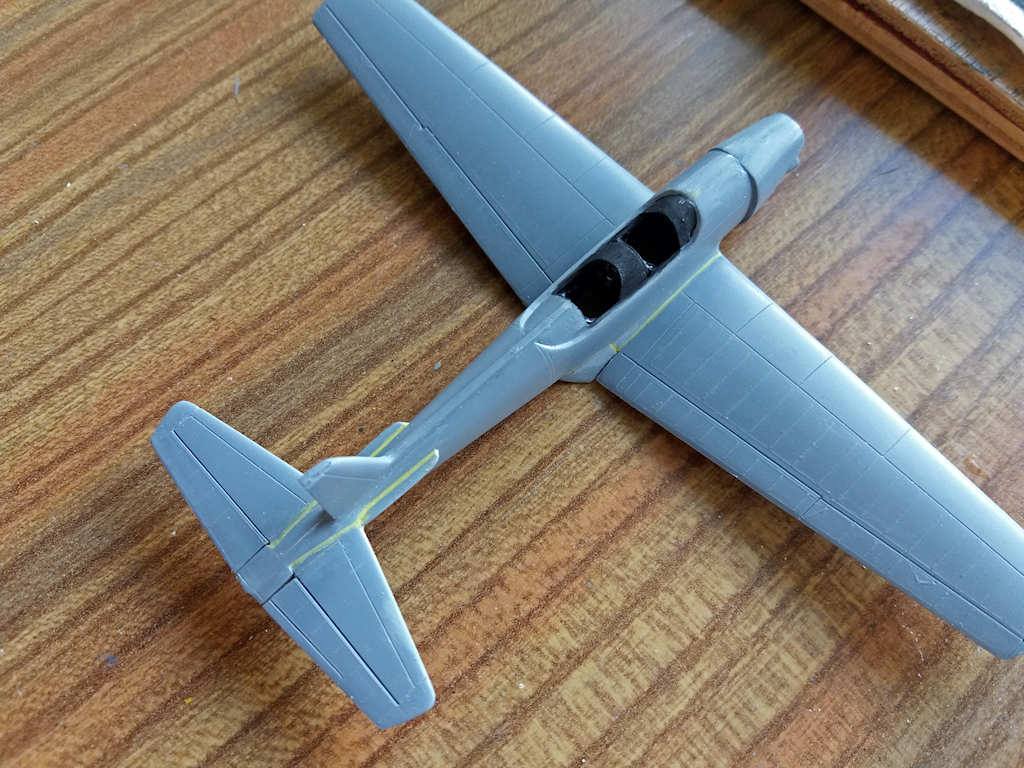
So here is the basic assembly, and there were big gaps to be filled with modelling putty.
 Chipmunk T.10 (9) w by Philip Pain, on Flickr
Also on the tail, and the spin-recovery strakes were a bitch to get right due to their small size, and vague fit. Also it should be completely flat from one tailplane to the other, but the AZ model has a raised rear fuselage in between. This took a lot of whittling down.
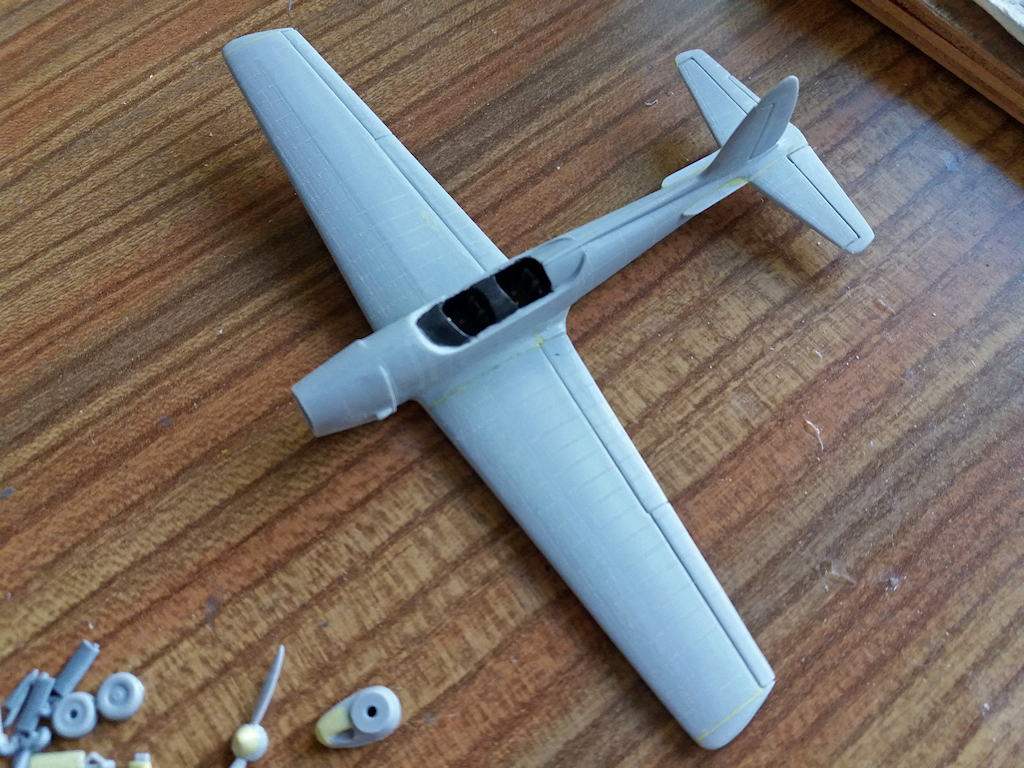
So I was starting to lose faith with this model, so I dug out one of my un-built original Airfix kits, to compare notes and check out the differences;
 Chipmunk T.10 (10) w by Philip Pain, on Flickr
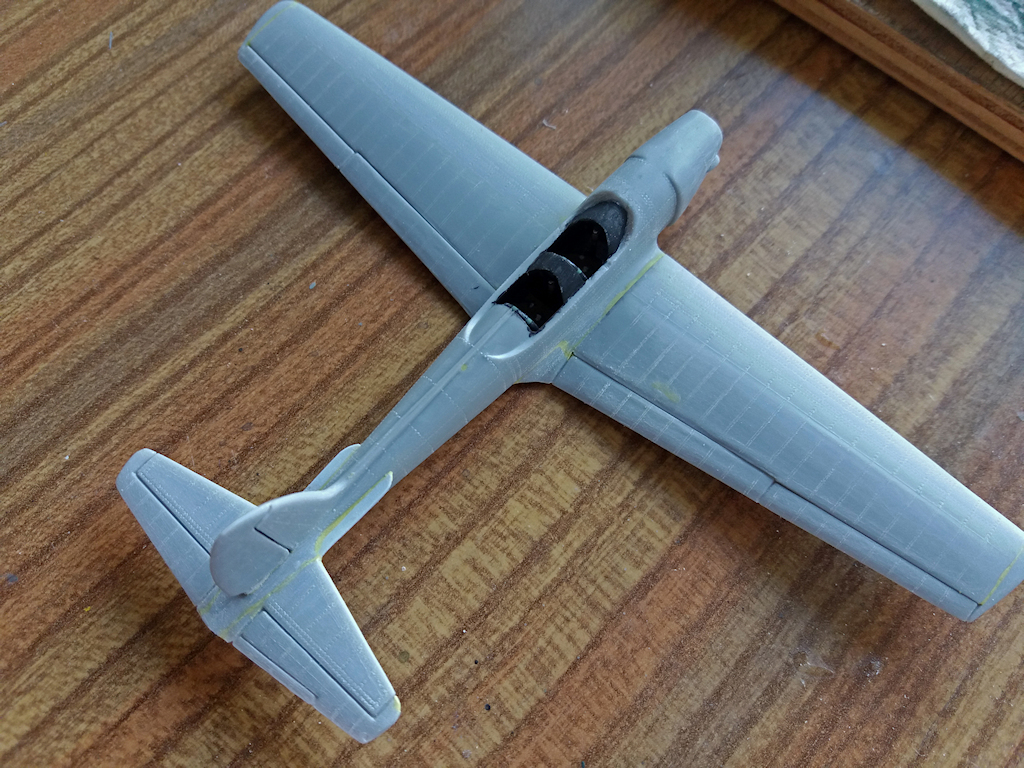
And then I couldn't help but start making the Airfix one as well! This time using the AZ model as a guide to correct the Airfix one.
 Chipmunk T.10 (11) w by Philip Pain, on Flickr
Added a basic interior to the Airfix one, and scratch built a pair of spin-recovery strakes for the back end. The Airfix kit also has an annoying feature at the back end, with the tailplanes split where there isn't a split on the real thing. This takes careful filling and sanding to get the required flat finish from one side to the other. But basically the Airfix main parts go together well, with smaller and better aligned gaps.
 Chipmunk T.10 (12) w by Philip Pain, on Flickr
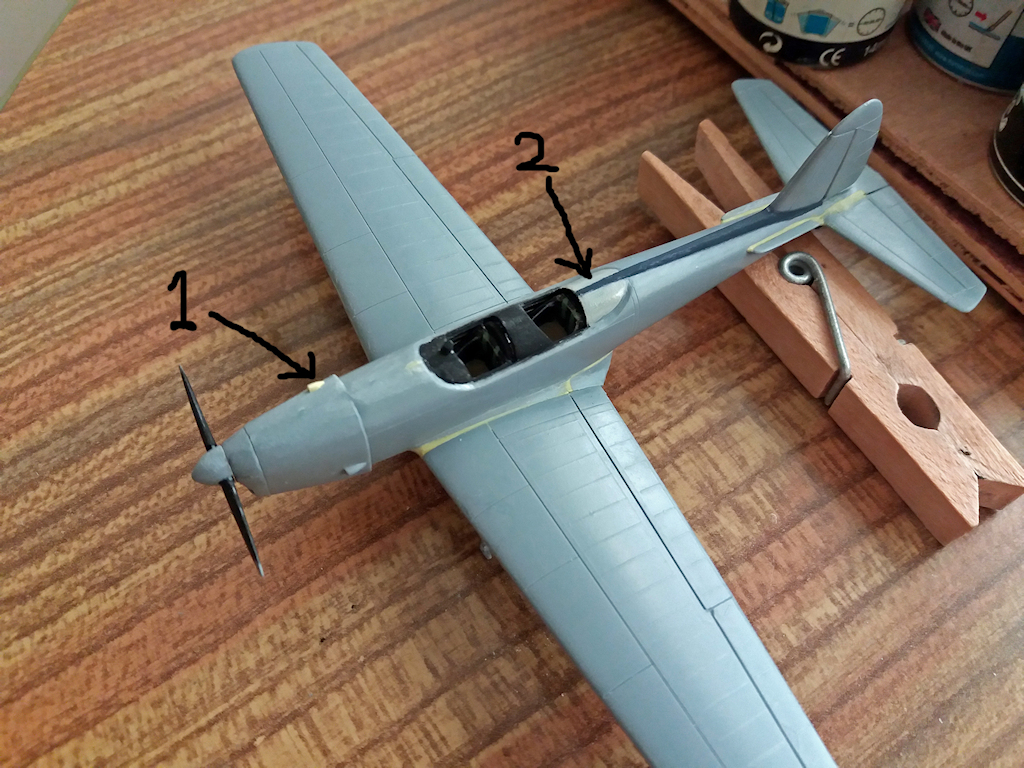
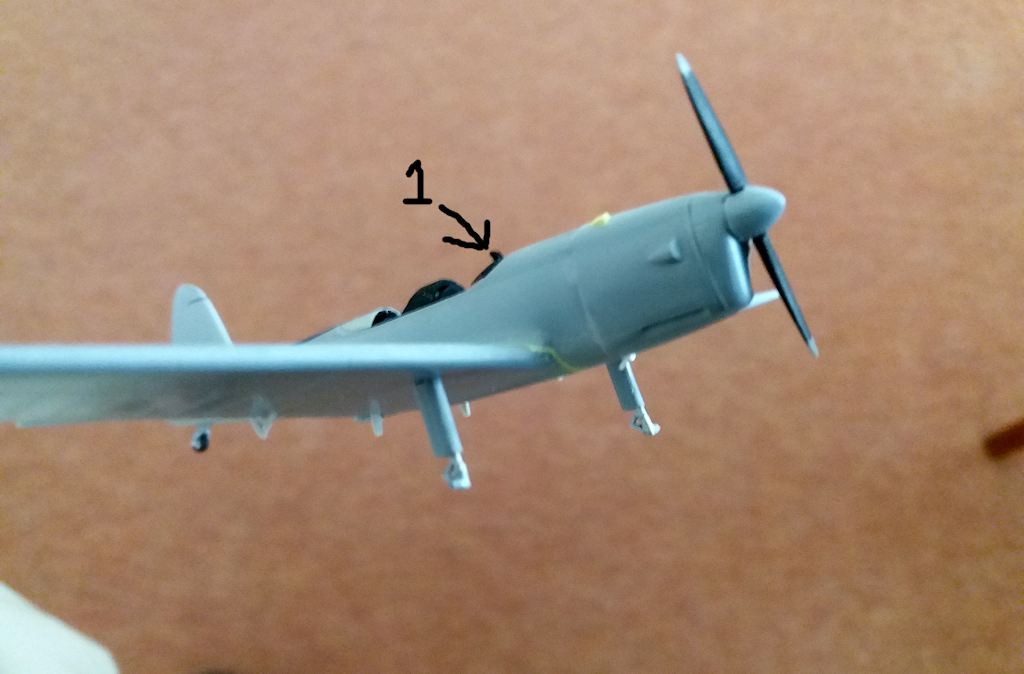
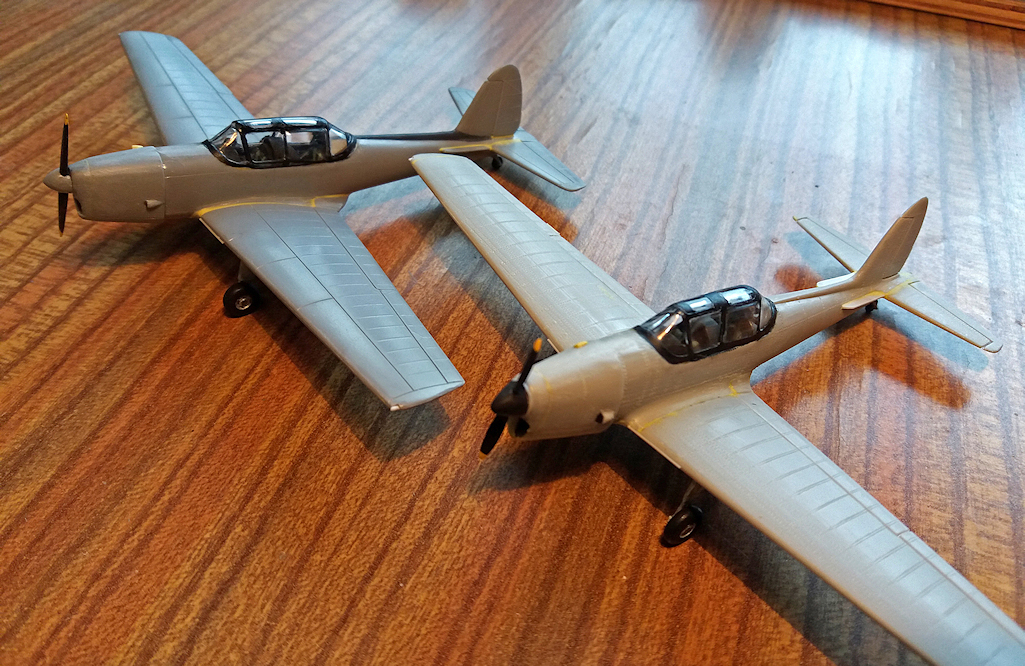
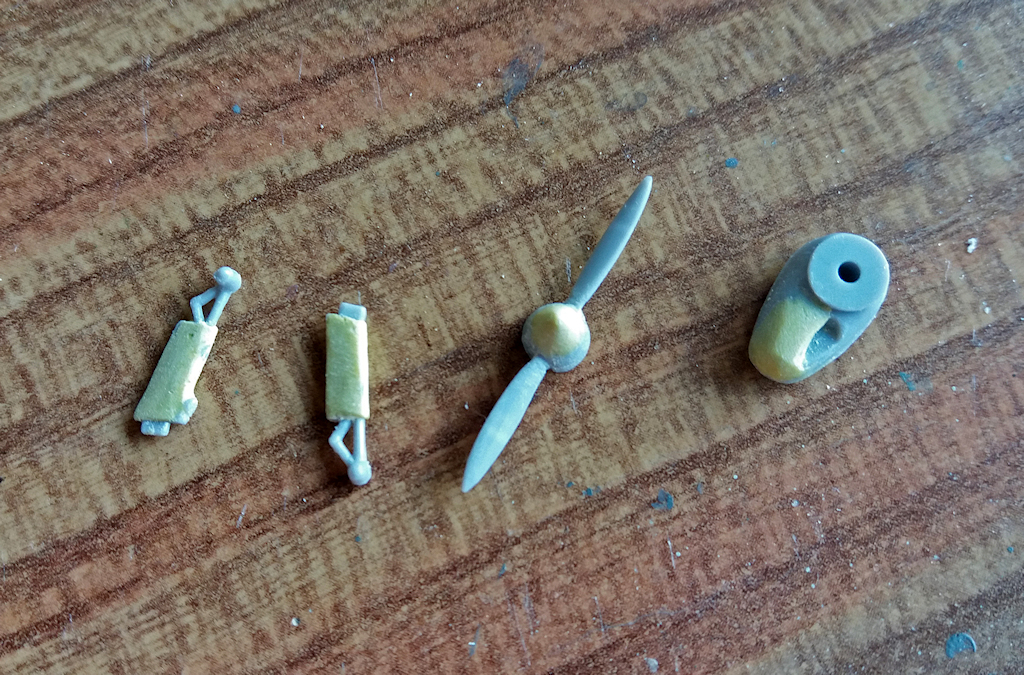
Using the AZ kit as a guide, the incorrect Airfix nose, spinner, and undercarraige legs were then improved using modelling putty. In this photo they still need a bit of finishing off.
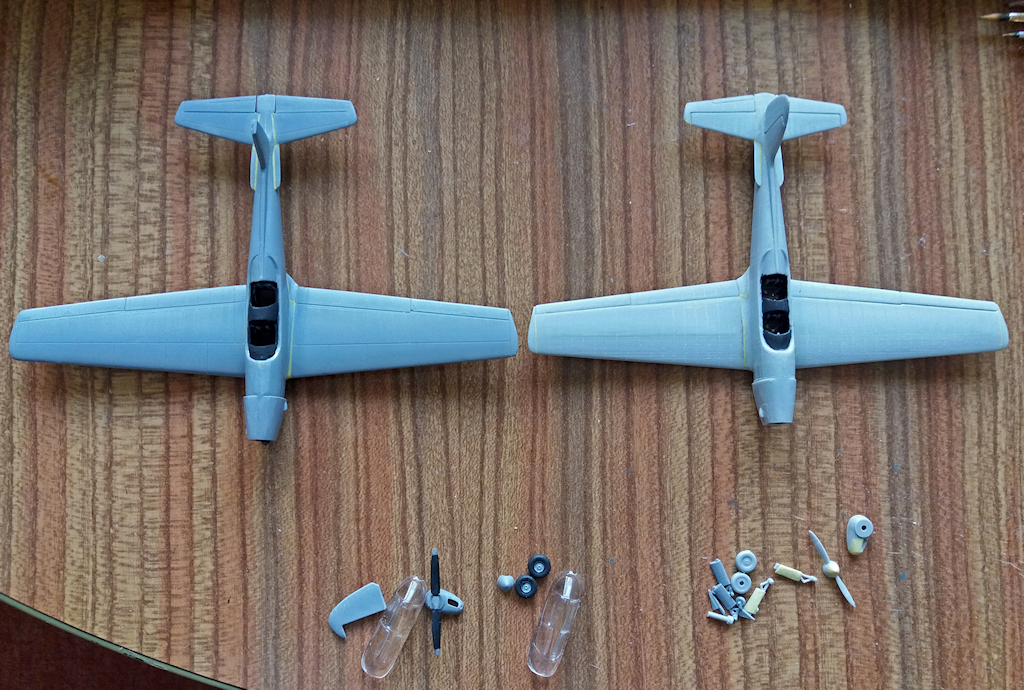 Chipmunk T.10 (13) w by Philip Pain, on Flickr
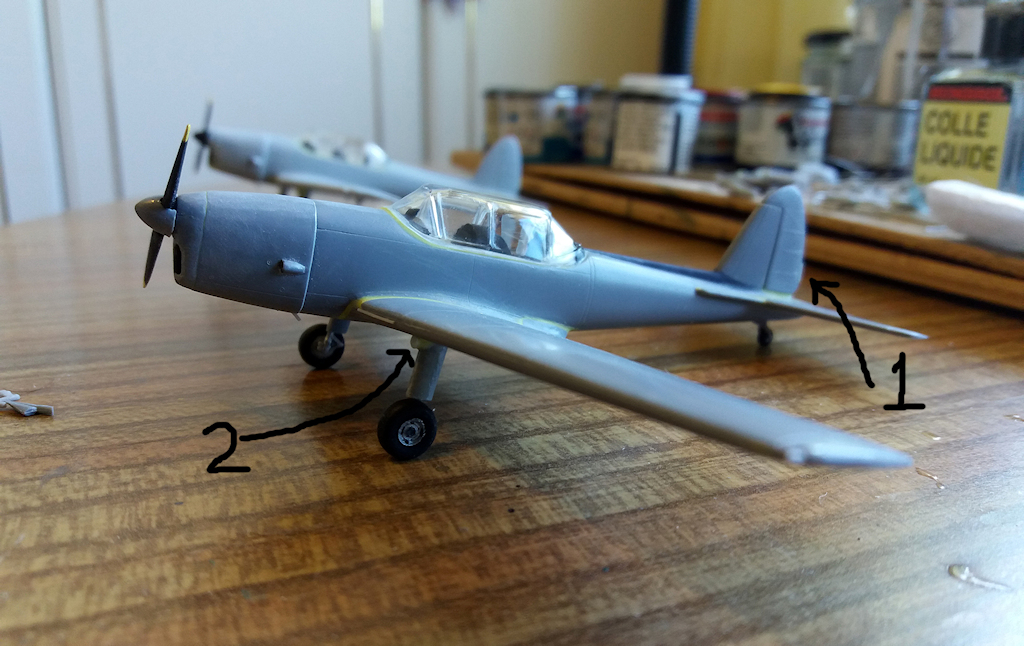
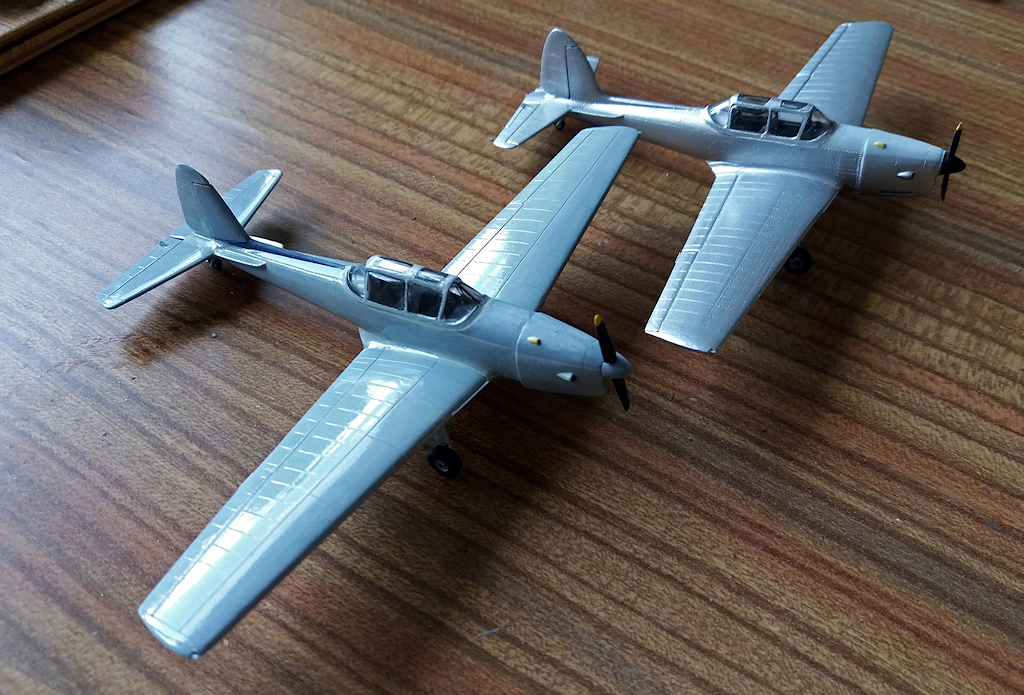
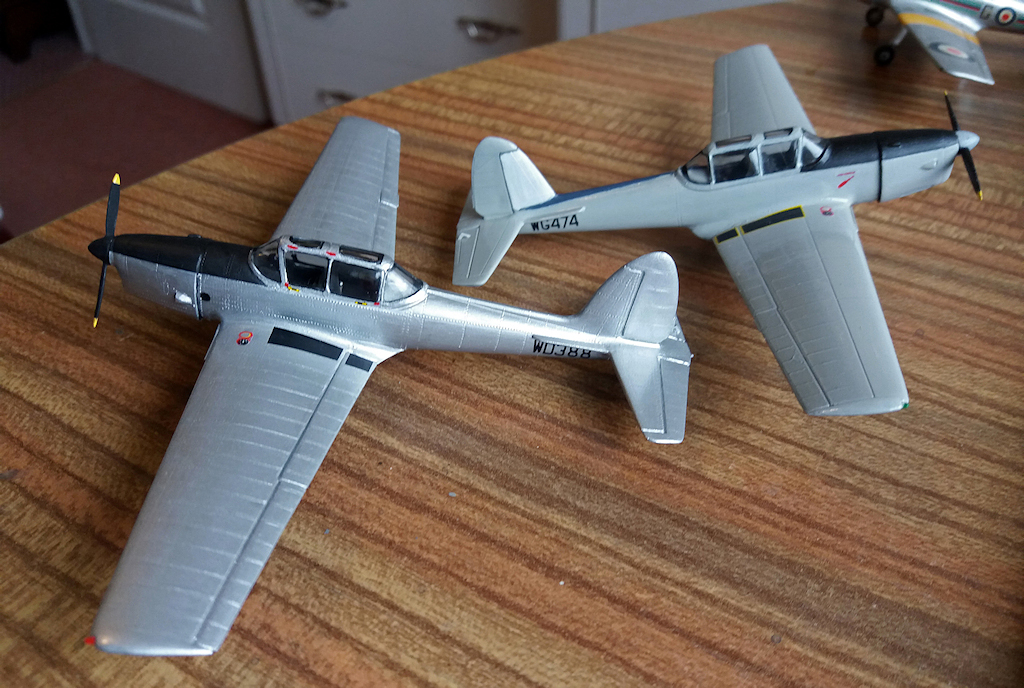
So now there are two, roughly similar. The front instrument coaming on the Airfix Chipmunk (right) has also been extended, just to make it look better.
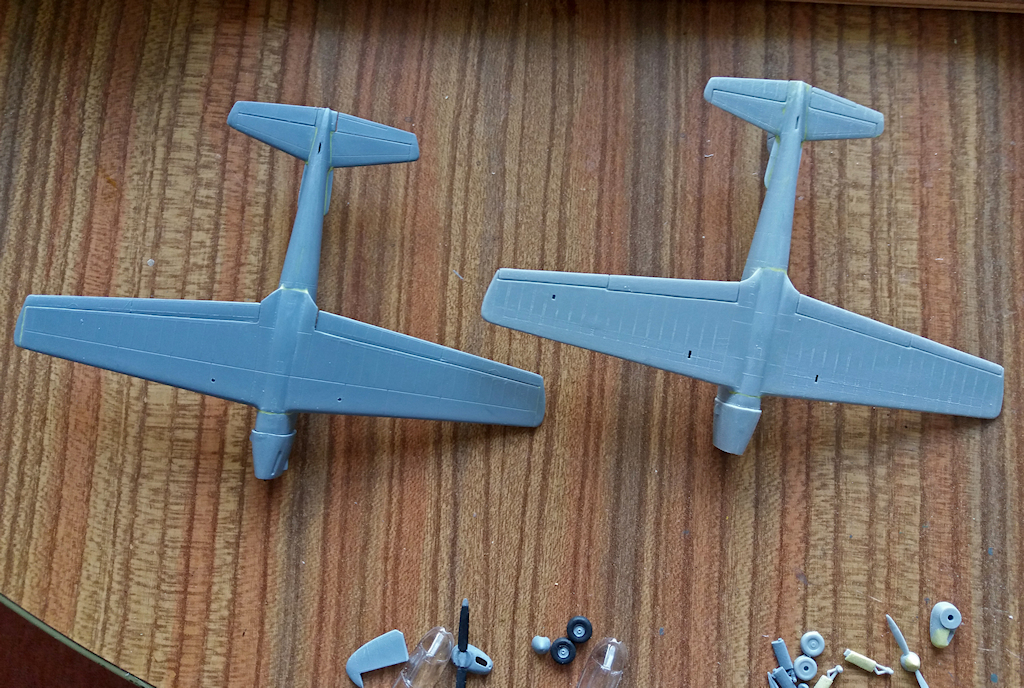 Chipmunk T.10 (14) w by Philip Pain, on Flickr
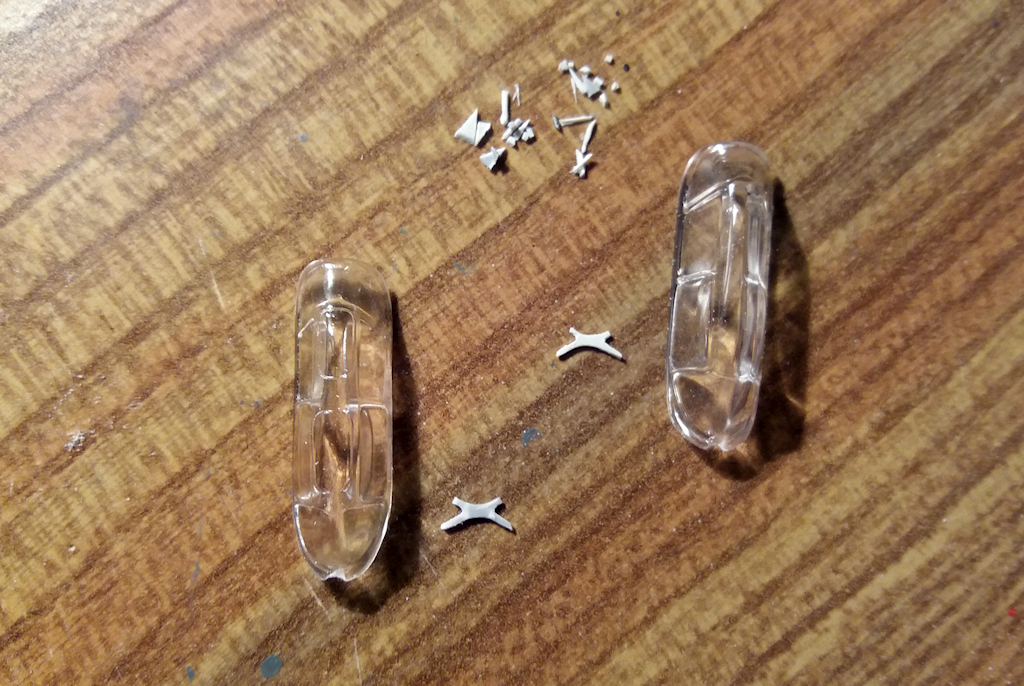 Chipmunk T.10 (15) w by Philip Pain, on Flickr
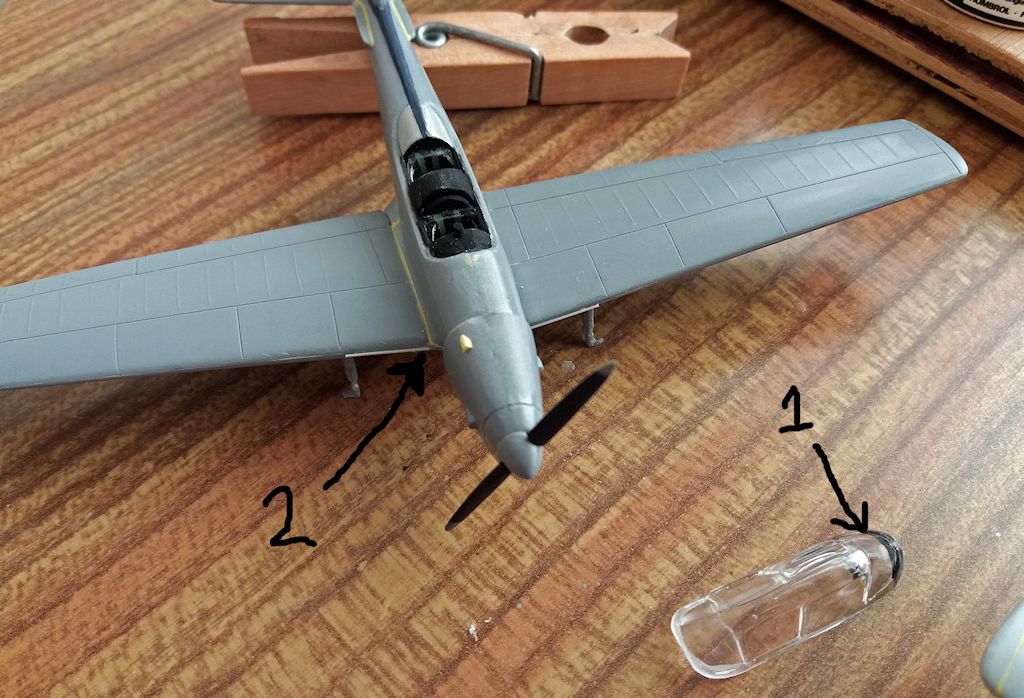
Here are the two canopies, AZ on the left. Both have had the front and rear external frames filed off and re-polished. Also being made are the two prominent internal frames to go in the rear of each canopy, both absent from the kits. I'm not looking forward to gluing them in place, as there is no room for error with glue and transparencies.
So that is the progress, so far.
The starting point is an Airfix 1/72 Chipmunk T.10 that I built way back in 1969, shortly after the kit was released;
 WK574, Cambridge UAS, c 1952 by Philip Pain, on Flickr
I have never been happy with the look or accuracy of this kit, but at the time my skill only ran to doing something to correct the canopy, substituting the 'canadian option' windscreen which doesn't have an external frame at the front (it is internal on the real aircraft).
 WK574, Cambridge UAS, c 1952 by Philip Pain, on Flickr
The model is showing its age and the transfers have yellowed. In this view it can be seen that I added the missing flap actuation hinges.
 WK574, Cambridge UAS, c 1952 by Philip Pain, on Flickr
The main problem with the 'look' of the Airfix Chipmunk is that it doesn't have enough 'chin' at the front, also the propellor spinner is too short and bulbous. The intakes on the sides of the engine also too bulbous.
 WK574, Cambridge UAS, c 1952 by Philip Pain, on Flickr
The other big problem is the undercarraige legs which are far too slim, and the wheels don't look right either, being too 'square'.
 WK574, Cambridge UAS, c 1952 by Philip Pain, on Flickr
 WK574, Cambridge UAS, c 1952 by Philip Pain, on Flickr
The cockpit has two seats and nothing else, so I added scratch-built instrument panels.
 WK574, Cambridge UAS, c 1952 by Philip Pain, on Flickr
All of the raised rivets were rubbed down, not that they shouldn't be there, but they were far too prominent. I made a mistake with painting the yellow 'T-bands', they don't go on to the flaps.
So I was delighted when AZ Models recently released a new 1/72 Chipmunk kit, and the box promises much;
 Chipmunk T.10 (1) w by Philip Pain, on Flickr
 Chipmunk T.10 (2) w by Philip Pain, on Flickr
The contents were less inspiring, but seemed ok
 Chipmunk T.10 (4) w by Philip Pain, on Flickr
It is a typical 'short-run' kit, a bit rough around the edges, and generally lacking mounting pins and tabs, making it hard to glue together at times.
 Chipmunk T.10 (7) w by Philip Pain, on Flickr
It has a full cockpit interior, but a familiar problem soon became apparent - once again the canopy is wrong! External frames front and rear, don't Chipmunk mould makers ever go and look at the real thing!? The AZ Models canopy is actually worse than the original Airfix one, because the windscreen is too long with the main frame set too far back. So I've tried to disguise this fault by extending the forward instrument coaming to fill the gap.
 Chipmunk T.10 (8) w by Philip Pain, on Flickr
So here is the basic assembly, and there were big gaps to be filled with modelling putty.
 Chipmunk T.10 (9) w by Philip Pain, on Flickr
Also on the tail, and the spin-recovery strakes were a bitch to get right due to their small size, and vague fit. Also it should be completely flat from one tailplane to the other, but the AZ model has a raised rear fuselage in between. This took a lot of whittling down.
So I was starting to lose faith with this model, so I dug out one of my un-built original Airfix kits, to compare notes and check out the differences;
 Chipmunk T.10 (10) w by Philip Pain, on Flickr
And then I couldn't help but start making the Airfix one as well! This time using the AZ model as a guide to correct the Airfix one.
 Chipmunk T.10 (11) w by Philip Pain, on Flickr
Added a basic interior to the Airfix one, and scratch built a pair of spin-recovery strakes for the back end. The Airfix kit also has an annoying feature at the back end, with the tailplanes split where there isn't a split on the real thing. This takes careful filling and sanding to get the required flat finish from one side to the other. But basically the Airfix main parts go together well, with smaller and better aligned gaps.
 Chipmunk T.10 (12) w by Philip Pain, on Flickr
Using the AZ kit as a guide, the incorrect Airfix nose, spinner, and undercarraige legs were then improved using modelling putty. In this photo they still need a bit of finishing off.
 Chipmunk T.10 (13) w by Philip Pain, on Flickr
So now there are two, roughly similar. The front instrument coaming on the Airfix Chipmunk (right) has also been extended, just to make it look better.
 Chipmunk T.10 (14) w by Philip Pain, on Flickr
 Chipmunk T.10 (15) w by Philip Pain, on Flickr
Here are the two canopies, AZ on the left. Both have had the front and rear external frames filed off and re-polished. Also being made are the two prominent internal frames to go in the rear of each canopy, both absent from the kits. I'm not looking forward to gluing them in place, as there is no room for error with glue and transparencies.
So that is the progress, so far.

