|
|
Post by jetdragon on Nov 16, 2017 11:08:47 GMT 1
Keep the pics coming Ron - they're great memories
JD
|
|
|
|
Post by viscount on Nov 16, 2017 13:26:57 GMT 1
Elsewhere on this forum: derbosoft.proboards.com/thread/13889/liverpool-aviation-accidents-incidents I find I have the crash location referred to as 'Old Roan', the 'Bootle' as was memory as I knew it was not Aintree but close by, should have looked it up! The crash was commonly referred to as 'Aintree' as that was where the aircraft was bound for and had flown over, but certainly the scene of the crash was not actually in 'Aintree'. The AAIB investigation came to no certain conclusion, but thought that distraction between two pilots over whether to land at Aintree or not, coupled with marginal conditions led to a lost of spacial awareness and subsequent crash. The landing strip at Aintree race course was subsequently closed to fixed wing aircraft whatever the weather. |
|
|
|
Post by viscount on Nov 16, 2017 16:43:54 GMT 1
Very brave of you, Ron, to post your early attempts at mastering Photoshop. Nice pictures to select too.
If I may be permitted, a few public comments. While there is certainly a difference between the two Dan Air '1-11 images. A couple of tips from my experience. First, a great deal of the 'muck' on the slide is fairly loose dust. I was once given the tip to tap the mount sharply on a solid surface. I found that Agfa and Fuji slides were more likely to slip within the mount than any dust to fall off! Another tip I've never tried is to use a hair drier set on cold. So I use a mix of a soft brush (with some suction from a battery driven device) and a clean soft cloth - I use the Opticians cloth found in the box with new Specs. It is washable too. I do risk scratching the surface if there is any grit, rather than dust present, so use the cloth on the shiny 'front' side of a slide mostly. Never get water or dampness near the back of the slide. The more dust you can remove pre-scan, the easier the digital clean-up is later. Equally ensure the glass paten on the copier is dust free, in a session of copying I'll clean the glass several times. Guard too against the dust you are disturbing when cleaning, floating down onto an already cleaned transparencies.
When cleaning dust, hair and small marks off the digitised image using Picassa (and likely similar on Photoshop) 'retouch', I expand the image I'm cleaning, so that I clean around quarter of the image at a time - the actual amount of zoom required varies. This means that I am cleaning away specks that on the original screen image could barely be seen. However once posted the images are larger on-screen than while cleaning, so any remaining specs 'grow' in size and density, possibly that is why you are not quite happy yet with the '1-11 image. At times I've viewed mine on the living room 'big' tele and the results of finer working really show then. For marks on detail areas eg cockpit windows, airline names, on cheat lines, people, or in the example case the horizon line, I will zoom in further even (but rarely) right to the 600% limit, then when finished the detail, move out again to the quarter image. May take longer, but you start to get impressive results like Bob's. Cleaning removal speed will gather with practice and experience and knowing just how large an area to cover with each 'remove' will become instinctive - indeed rather addictive like those early PC games where you had to find and zap objects quickly, then move onto the next.
That 'I-II will improve further, even just the ten most significant flecks and spots once removed would make a great visual difference. The Aer Lingus '720 is a better original, but I'm sure being a small original if zoomed out sufficiently then defects will start to appear.
A good and encouraging start, well done Ron - and I hope that others who have dormant slide collections will take up the cleaning and subsequent posting challenge too.
|
|
|
|
Post by vfr800 on Nov 16, 2017 17:05:58 GMT 1
In the very background of the first photo, are they Brittania 737's?
|
|
|
|
Post by Samba on Nov 16, 2017 17:16:14 GMT 1
We had two Britannia 737s, a BMA Viscount and a DC 9 in the background.
Bob.
|
|
Deleted
Deleted Member
Posts: 0
|
Post by Deleted on Nov 16, 2017 18:40:05 GMT 1
We had two Britannia 737s, a BMA Viscount and a DC 9 in the background. Bob. Is that a Tradewinds CL44 loading on 26/08 too? |
|
|
|
Post by Samba on Nov 16, 2017 19:14:06 GMT 1
Well spotted, i missed that one.
|
|
|
|
Post by viscount on Nov 16, 2017 19:17:39 GMT 1
The date for the photo, stated as May 1975 is most certainly wrong. In that month neither were there 2 Britannia Boeing 737s nor Dan Air's G-BDAE - there were Manchester diversions in April - but the 3 key aircraft don't figure. Going back to do some digging in the logs - unfortunately only have upto February 1972 on Excel at present, so the search through the logs is page-by-page! Be back soon if I find the answer .. rather longer if I don't!
Back later on 'edit' to admit defeat
Wasted a great deal of time looking through Log Books for 1975, 1976 and 1974 before it twigged .. while I was looking for G-BDAE and two BY Boeing 737s in the early/mid '70s - the real indication that the date is way out is that BMA did not use a DC-9 into Liverpool before October 1978! Have looked at winters upto the DC-9 being withdrawn by BMA from the London route circa 1982/83, but as yet with no success of nailing a date. While the weather is snowy, the diversions could have been through industrial action (1979, 1980, 1983 mainly) or overnight runway work at Manchester (1979 and 1980 mainly). By May 1985 BMA was down to a Viscount and a Friendship at Liverpool. Cannot be after April 1986 due to the move from the terminal.
There are other aircraft beyond the obvious 5 (DA BAC.1-1, BM Viscount and DC-9 plus 2 x Britannia Boeing 737s) - there is a T-tail (likely a BAC-111) tucked around the far end of the terminal, something concealed behind the DC-9, and maybe two aircraft parked out on 08/26, far from certain of types, but I can see why an earlier poster can see it as a Tradewinds CL-44, but have no recollection of one ever being unloaded so remote. This almost certainly points at a period of Manchester closure - so the logs show strike action or runway work as the cause of diversion, not the weather. Didn't expect to fail to find an answer as to the date ... still looking though, however without too much hope.
Back even later with a possible date!
If that is a CL-44 with tail open on 08/26 (can 'Samba' locate his digital image on his PC and zoom-in to confirm?), then visits by that type are far fewer than Dan Air BAC.1-11s or Britannia Boeing 737-200s. So consulting a thread elsewhere on this section, find that there were a number of CL-44s with freight due to driver's disputes and road weather disruption in January 1979. Looking back in 'EGGP' the MAS Liverpool movements magazine find that G-BDAE diverted in evening of Thursday 25th January 1979, not departing until Saturday 27th. During that period Tradewinds (IATA code IK) CL-44 G-AWGS arrived from Athens, not departing until Sunday 28th - which leaves a 'window' of Saturday morning 27th with both on the ground together. There were more than 2 Britannia Boeing 737s around at the time too (4 diverted in overnight). The diversions were due to withdrawal of fire cover at Manchester for around a week, and I remark at the time that the position was further confused by snowfalls too. So the most likely candidate for the photo, well the only candidate I've located, is 27th January 1979.
|
|
Deleted
Deleted Member
Posts: 0
|
Post by Deleted on Nov 16, 2017 19:20:35 GMT 1
I've just noticed what looks like another Dan Air 1-11 behind the portacabin and a high tailwing behind the DC9. So 8 aircraft in that shot. Thanks for sharing it with us.
Viscount. Were the portacabins put in place for the MAN Fire strike in the summer of 1979? If so, could be 1980 onwards.
|
|
|
|
Post by acklington on Nov 16, 2017 19:36:21 GMT 1
Never get water or dampness near the back of the slide. The more dust you can remove pre-scan, the easier the digital clean-up is later. I've been following this thread with interest, having scanned and restored hundreds of slides from my collection, plus many from other photographers. All of the advice given here has been very sound. However, I would like to confirm that you can wash slides and negatives - carefully! This is sometimes necessary if the slide has had greasy finger marks on it, or, as can happen with age / storage in humid conditions, the slide starts to grow fungus on the emulsion. This is like a spidery blob that grows and thickens - don't try to scrape it off, the emulsion will come with it. All photographic negs and slides are originally washed as part of the production process, to remove remaining chemicals. So to wash a slide, carefully remove it from the mount. Plastic mounts are usually re-useable, but older cardboard mounts will have to be replaced with a plastic mount - you used to be able to buy boxes of these empty mounts. Incidentally the old cardboard mounts were a major source of dust and specks, which is presumably why they were discontinued. Once the slide (or neg) is out of the mount prepare a lukewarm bowl of clean water, and add no more than one or two small drops of washing up liquid to it. Just enough to make your finger tips feel slippery. Dunk the slide in, and gently use your fingertip to wipe the marks off it, emulsion side as well. You should be able to see when the marks or fungus has come off. Then rinse the slide thoroughly under lukewarm running water. Gently shake excess water off it - it is better that it stays wet all over the surface, rather than ending up with separate water spots on the surface. Then use a clean clothes peg to hold the edge of the slide, and place it somewhere safe to dry naturally. The slide (or neg) will curl a bit while drying, but should straighten out once dry. Also the water on it will tend to sink to the bottom edge, where it will form a blob, but resist the temptation to do anything more to it. It will dry. I've done this many times, and it works fine. Just be careful to avoid sudden changes of temperature while doing it all. Even years later there is no sign of deterioration or damage. I once did it to a slide (not mine) that was 50% covered in fungus, a real write off. It cleaned up very well, and just a few of the deeply damaged areas needed some scanning and erasing afterwards with the clone tool. Here's a Manchester one I've just done a full restoration on; 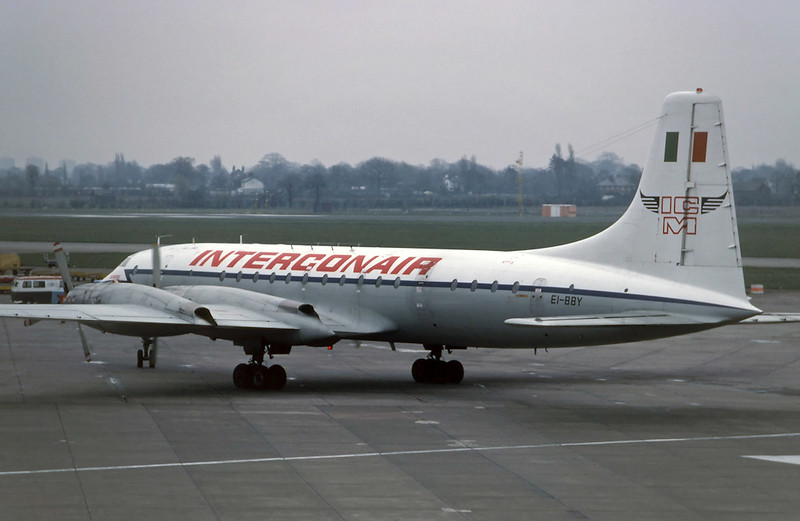 EI-BBY (XL658 Adhara), Manchester, 19 April 77 (1) fw EI-BBY (XL658 Adhara), Manchester, 19 April 77 (1) fw by Philip Pain, on Flickr |
|
|
|
Post by radiostationx on Nov 16, 2017 21:01:04 GMT 1
Very Nice photo acklington, I havent had much in the way of experience of 35mm slides for some years, I used to use 35mm neg film a lot though. I would imagine that a handy tool I use for cleaning my camera sensors would do a decent job of dusting off a slide. A Giottos Rocket Air Blower, a marvelous tool, quite cheap as well. 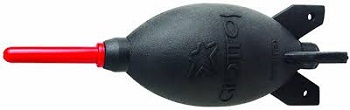 The hand pump bulb provides quite a bit of "blow" through the small hole at the spout and you can carry out cleaning of a ccd sensor with no fear of touching the delicate filter surface. There are lots of cheaper knock off clones of the giottos rocket blower that you can buy for around £3-£4 from Chinese vendors may work just as well. Some very good tips viscount and acklington, I wonder is it any better if distilled/purified water is used at the final rinse stage,I use this to clean my telescope mirror as it dries without any marks as it is free of minerals. |
|
|
|
Post by andyh on Nov 16, 2017 22:18:03 GMT 1
Indeed, keep them coming - some excellent images of a period I wish I had been around to enjoy! They don't make them like they used to!
|
|
|
|
Post by ronturner on Nov 17, 2017 9:47:23 GMT 1
Thanks to everybody for advice and help. There is more to this than I bargained for.
Anyway, thanks mainly to more sterling work by Mike, my 1-11 photo, in a previous post, has been replaced with a more perfect version. I hope you like it.
I particularly liked this photo because it included a marshaller ( or engineer) on the tarmac and people viewing on the balcony. The proximity was excellent, wasn't it?
|
|
|
|
Post by radiostationx on Nov 17, 2017 10:46:39 GMT 1
No worries Ron, The trouble is with you 1960s/70s "slide spotters" is that you all knew how to use a camera and compose a frame. The dust and marks seem to gather worst at edges of the slide and you guys didn't leave much room for today's digital cropping techniques. This means that cleaning up can be very time consuming but as shown in all the above period images,they remind us of a different era and in the case of Ron's laker 1-11 photo , a family enjoying the viewing terrace. The ladies are dolled up a bit so perhaps they may have going on a trip snd waiting for their flight,or just a weekend out with family at the airport.Dad has has camera/binocs. Even the flowers in the planter add to the nostalgic theme. On Ron's aer Lingus night shoot photo, there are ghostly goings on at that airport, look at ground staff ! Lovely clean image acklington nice editing skills. Ps does anyone have photos of the inside of the old airport showing the beautiful art deco interior ? A cathedral of aviation. A lot of the photos I enjoyed looking at have succumbed to photobucket ransom demands. Too long ago for me, I started spotting on the terraces at MAN in the 1980s which was great but a world away from this. Excuse my ignorance, Someone educate me please, why did the old airport close and move up the road ? |
|
|
|
Post by acklington on Nov 17, 2017 11:16:13 GMT 1
Anyway, thanks mainly to more sterling work by Mike, my 1-11 photo, in a previous post, has been replaced with a more perfect version. I hope you like it. I particularly liked this photo because it included a marshaller ( or engineer) on the tarmac and people viewing on the balcony. The proximity was excellent, wasn't it? The one-eleven photo is now looking very good, well done! My next suggestion is not a 'must do', but answers another point about cropping not leaving enough to work with. Using the crop tool on your photo programme, it is usually possible to extend the crop to create a new blank (white) border to one or more sides of the image. As shown thus; [on this white page the extended white space doesn't show, but it is there! Just click the image to see it.] 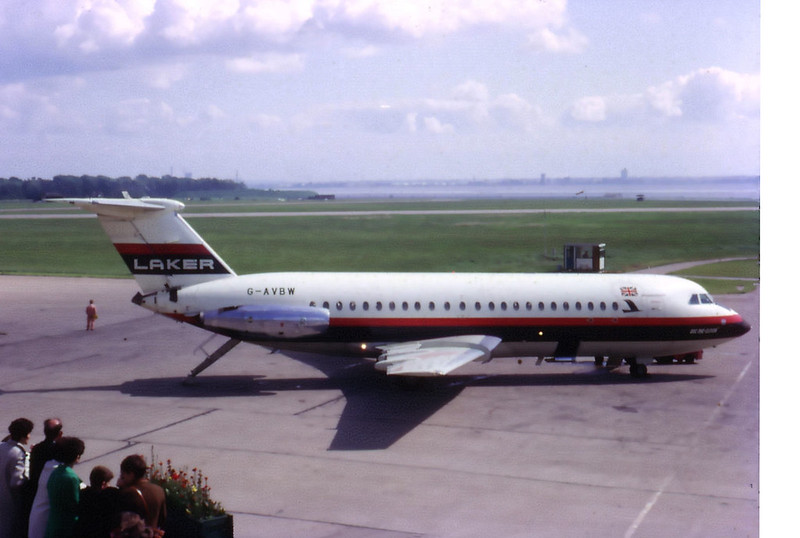 24605761598_a47a4f6707_h c 24605761598_a47a4f6707_h c by Philip Pain, on Flickr This image then easily lends itself to using the clone tool to extend the background detail into the new blank space. I've cropped a bit off the left side of the image to improve the balance; thus 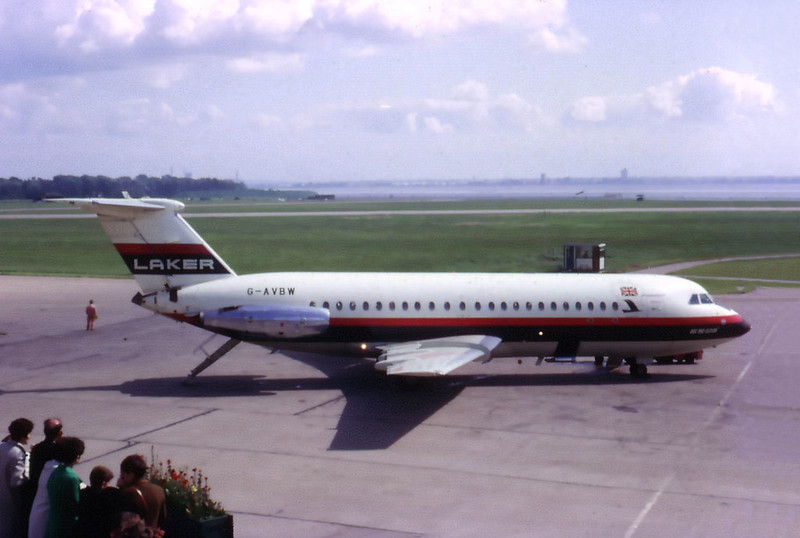 24605761598_a47a4f6707_h c r 24605761598_a47a4f6707_h c r by Philip Pain, on Flickr Who says that the camera never lies! |
|


